What is Pumpit?
Pumpit is a free volume ducker for Mac and Windows. It turns the level of a track down and back up with a fixed curve shape on every trigger, for the sidechain pumping of house and techno. The duck can run on its own in time with your project, follow a kick on the sidechain input, or fire from MIDI notes.
You pick the shape from the curve menu or draw your own, and Amount sets how deep it goes. Multiband mode splits the sound at an adjustable crossover and ducks only the low band, so the highs pass through untouched. A 5 ms lookahead lets the duck land before the hit, and Pumpit reports that latency to your DAW so everything stays in time.
How does volume ducking work?
Volume ducking turns the level of a track down and back up with a fixed shape, creating the breathing pump heard in house and techno. The duck can be triggered by a tempo-locked clock, by a sidechain input (typically a kick), or by a MIDI note. The shape of the curve sets the character: a smooth curve gives a gentle swell, a punchy curve gives a snappy dip, and a custom curve gives any shape you draw.
Multiband ducking splits the signal at a crossover frequency and ducks only the low band, so the hi-hats and vocals stay at full level while the bass pumps with the beat. A lookahead delays the audio so the duck lands before the transient, and your DAW compensates for that delay.
Quick start
Get a result with Pumpit in under a minute.
- Insert it. Put Pumpit on the track or bus you want to process.
- Pick a preset. Open the Presets menu and choose one close to what you want.
- Shape it. Work through the numbered controls below until it sounds right to your ear.
- Blend to taste. Pull Mix back from 100% if you want a subtler result.
- Compare. Bypass the plugin in your DAW to hear before and after.
The interface
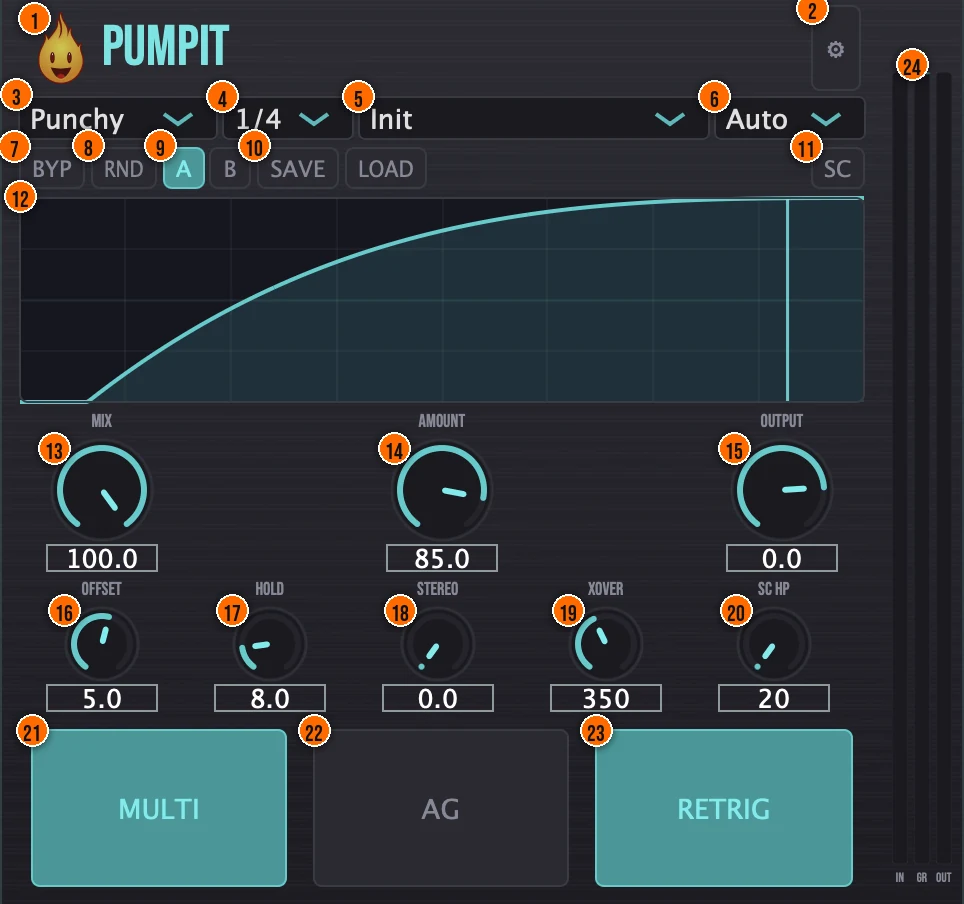
Controls
Top bar

- 1Fire Head: click the flame logo to open the About panel: what the plugin is, who made it, its version and the trademark notices. Click anywhere in the panel to close it.
- 2Audio Settings (gear): opens the Audio Settings panel. In the Standalone app, choose your audio device and its inputs and outputs there. In a DAW, audio routing is managed by your DAW, and the panel says so.
Envelope
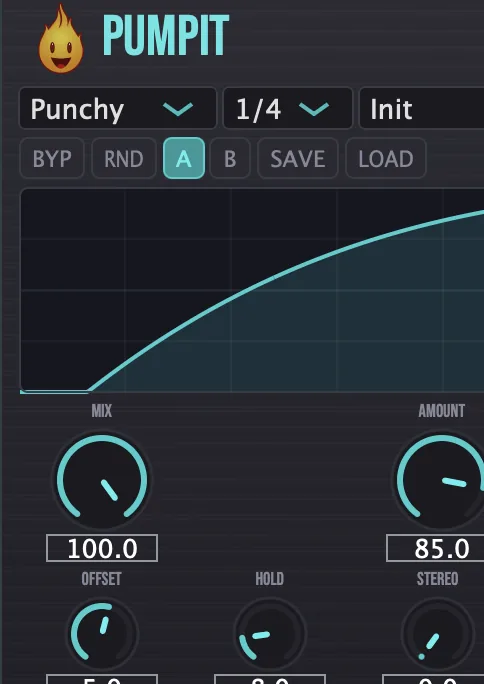
- 3Curve: the shape of the duck. Choose one of nine built-in shapes, or Custom to draw your own with 32 drag-editable control points joined by a smooth spline.Smooth, Punchy, Hard, Slow, Long Tail, Half Sine, Log, Exponential, Linear or CustomTip Smooth and Punchy work for most material. Custom lets you draw 32 control points for shapes that none of the built-in curves cover.
- 4Rate: how often the duck repeats, synced to your DAW's tempo.1/1, 1/2, 1/4 or 1/8Tip 1/4 is the standard four-on-the-floor pump. 1/8 gives a faster bounce; 1/2 a wider, slower swell.
- 14Amount: how deep the duck goes.0 to 100%Tip Start around 40% and raise it until the pump is as deep as you want. At 100% the signal ducks fully to silence.
- 16Offset: shifts the curve earlier or later, to nudge the pump if it feels ahead of or behind the kick.−50% to +50%Tip If the pump feels slightly ahead of or behind the kick, nudge Offset a few percent in the other direction.
- 17Hold: holds the ducked level before the curve starts to rise again.0 to 50%Tip Raise Hold for a wider groove: the level stays ducked a moment longer before the curve rises again.
- 18Stereo: Stereo Offset: delays the right channel's duck behind the left, so the pump moves across the stereo field instead of dipping in mono.0 to 20 msTip A small Stereo Offset (3 to 8 ms) makes the pump move across the stereo field instead of dipping both sides at once.
Presets and compare
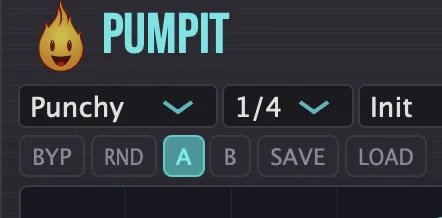
- 5Presets: 11 factory presets tuned for tech house and club production, from Init and Subtle Pumpit to Bass Only Duck, Pad Ducker and Remi Blaze Pumpit.
- 7BYP (Bypass): bypasses all processing, for comparing against the dry signal.
- 8RND (Randomize): new settings at random, for quick inspiration.
- 9A / B: compare two versions of your settings.
- 10Save / Load: write your own presets as .preset files, or bring one back.
Trigger
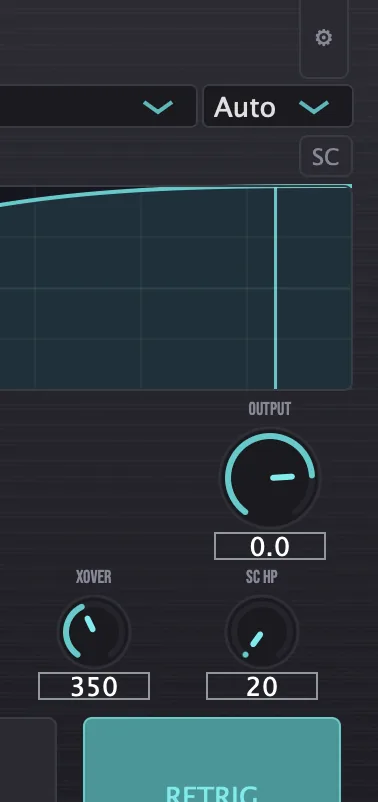
- 6Trigger mode: what starts each duck. Auto runs on its own in time with your project at the Rate. Sidechain follows an external input, such as your kick. MIDI fires on note-on messages, filtered to one note or Any.Auto, Sidechain or MIDITip To make the pump follow the groove, not just the kick, send the clap or snare to Pumpit's sidechain input as well. Each hit loud enough to trigger starts its own duck, so a clap between kicks adds an extra dip on pads and stabs, and a clap on the same beat as a kick merges with that duck. Keep RETRIG on so a hit that lands mid-duck restarts the curve, and use SC Listen to check that both come through SC HP.
- 11SC (SC Listen): plays the sidechain signal after its high-pass filter, so you hear what the detector hears.
- 20SC HP: a high-pass filter on the sidechain input, so low end doesn't over-trigger the ducking.20 to 500 HzTip Filter out the sub from the sidechain so it triggers only on the kick's click, not the sustained low energy that can cause false triggers.
- 23RETRIG (Retrigger): restarts the curve when a new trigger arrives. Turn it off and each duck runs to the end, even if the next trigger comes early.
Multiband
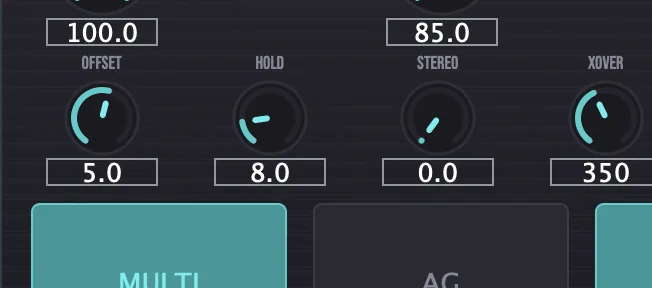
- 21MULTI (Multiband): splits the sound and ducks only the low band. The high band passes through unprocessed.Tip Turn on MULTI and set XOVER to around 200 to 300 Hz for a low-end-only pump. The highs pass through untouched.
- 19XOVER (Crossover): where the low and high bands split in Multiband mode. The crossover is a 4th-order Linkwitz-Riley, and the bands sum back without comb filtering at any Mix setting.100 to 5000 Hz
Output
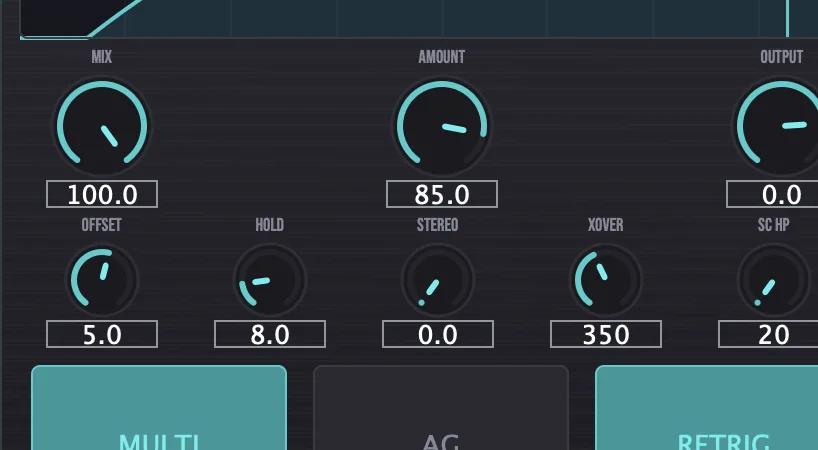
- 13Mix: blends the ducked sound with the dry signal, for parallel use or a subtler pump.0 to 100%
- 15Output: the level leaving Pumpit. A soft clipper on the output tames peaks.−24 to +6 dB
- 22AG (Auto Gain): automatic level compensation, worked out from the shape of the curve, for a fair comparison with Bypass.
Meters and displays
- 12Curve display: shows the current curve on a 4 by 8 grid in real time, with a ghost of the waveform behind it and a line that marks the playback position.
- 24IN, GR and OUT meters: the input level, the gain reduction and the output level.
Key specs*
| Curves | Smooth, Punchy, Hard, Slow, Long Tail, Half Sine, Log, Exponential, Linear, and Custom (32 points, Catmull-Rom spline) |
|---|---|
| Triggers | Auto (tempo-synced), Sidechain, MIDI |
| Rate | 1/1, 1/2, 1/4 or 1/8 |
| Lookahead | 5 ms, reported to your DAW for delay compensation |
| Multiband | 4th-order Linkwitz-Riley crossover, 100 to 5000 Hz |
| Sidechain high-pass | 20 to 500 Hz |
| Stereo Offset | 0 to 20 ms |
| Gain smoothing | 2 ms ramp, for click-free curves |
| Output | −24 to +6 dB, soft clipper |
| MIDI | Accepts MIDI input for MIDI trigger mode |
| Factory presets | 11 |
* Key specs from the plugin page. Some specs may not be listed.
How does sidechain ducking work?
When the trigger is set to Sidechain, a kick on a separate track drives the duck. The kick audio enters Pumpit's sidechain input, passes through SC HP to filter out sustained sub energy, and the detector fires the duck envelope, which turns the main signal down by the Amount and back up along the chosen Curve.
Set the trigger to Sidechain, route your kick to Pumpit's sidechain input in your DAW, and raise SC HP until the detector fires only on the click of the kick.
Two-band split
With MULTI on, Pumpit splits the signal at XOVER and ducks only the low band. The high band passes through untouched. A bass note's fundamental sits in the low band, while its harmonics stack up in the high band.
An A1 bass note (55 Hz) with XOVER at 100 Hz. The fundamental (blue) ducks with each pump, and the harmonics from 110 Hz up (orange) hold steady, so the bass line stays audible while the sub makes room. Raise XOVER toward 200 to 300 Hz and the first few harmonics duck too.
How do I pump only the low end of a mix bus?
- Load it. Put Pumpit on your mix bus, or the last insert before your limiter.
- Set the timing. Set the trigger mode to Auto and Rate to 1/4, and choose the Smooth curve for a gentle pump.
- Split the bands. Turn on MULTI and set XOVER around 200 to 300 Hz. Below it, the low band ducks; above it, the highs pass through.
- Set the depth. Raise Amount to around 40 to 60%, so the sub and bass pump while the hi-hats and snare stay put.
- Blend. Lower Mix if the pump is too strong.
- Compare. Turn on AG and use BYP to compare with the original at a matched level.
How do I duck a pad behind the kick using sidechain?
- Load it. Put Pumpit on the pad track.
- Set the trigger. Set the trigger mode to Sidechain and route your kick to Pumpit's sidechain input in your DAW.
- Filter the sidechain. Raise SC HP to 80 to 120 Hz so the sub does not over-trigger the duck.
- Pick the curve. Choose Punchy for a snappy duck or Smooth for a gentler swell.
- Set the depth. Raise Amount until the pad dips enough for the kick to come through.
- Compare. Turn on AG and press BYP to compare the ducked and unducked versions at the same loudness.
What about Pumpit Raw?
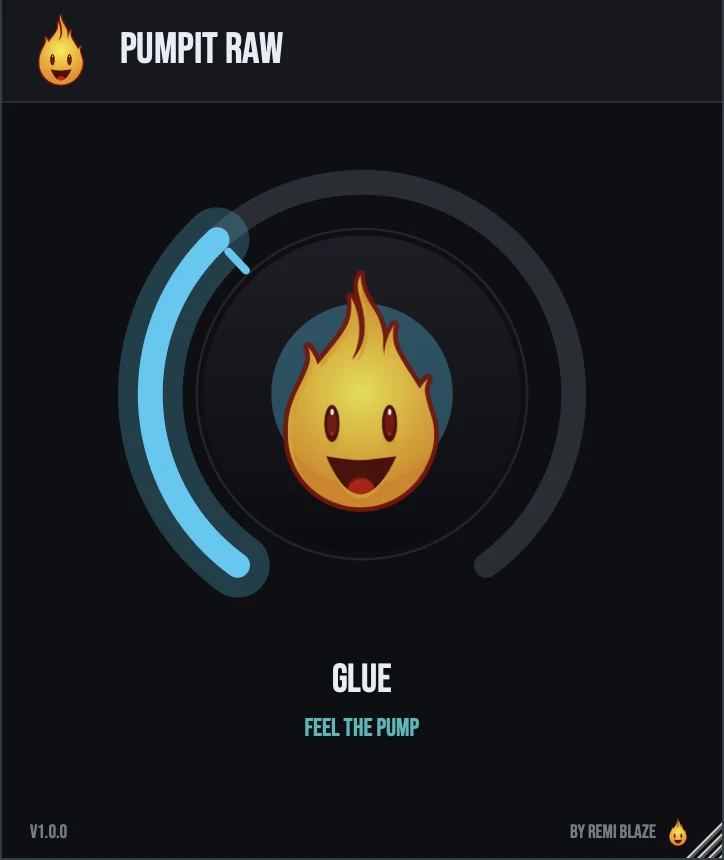
Pumpit Raw is the free one-knob version. Its GLUE knob sets the depth of a pump locked to a 1/4-note cycle of your DAW's tempo, with no routing and no sidechain input, from a subtle groove at low settings to a deep, punchy duck near the top. Auto gain is always on, so the level stays steady, and its 5 ms latency is fixed. Its own manual: Pumpit Raw manual.
Pumpit vs. Pumpit Raw
A side-by-side look at what each version includes.
| Feature | Pumpit | Pumpit Raw |
|---|---|---|
| Presets | Included | Not included |
| Randomize | Included | Not included |
| Mix (dry/wet) | Included | Not included |
| Output level | Included | Not included |
| Auto-gain | Not included | Included |
Keyboard and mouse shortcuts
These work in every Pumpit format (AU, VST3, CLAP, AAX, Standalone).
| Reset a control to its default | Double-click the knob or slider |
|---|---|
| Scroll to change a value | Hover over a knob and scroll the mouse wheel |
| Type an exact value | Click the value below a knob and type a number |
Frequently Asked Questions
What do Offset and Hold do?
Offset shifts the whole curve earlier or later, which helps when the pump feels ahead of or behind the kick. Hold keeps the level fully ducked for a moment before the curve rises again, for a wider groove.
Does Pumpit add latency?
Yes, 5 ms. The main audio is delayed so the duck lands before the transient, and Pumpit reports that latency to your DAW, which compensates for it automatically.
When should I turn off Retrigger?
With Retrigger on, a new trigger restarts the curve, which suits fast stutter effects. Turn it off when you want each duck to run its full shape, even if the next trigger arrives before it ends.
What does the Stereo knob add?
It delays the right channel's duck by up to 20 ms behind the left, so the pump moves across the stereo field instead of dipping both sides at once.
Auto or Sidechain: which trigger mode should I use?
Auto draws the same duck on every beat, locked to your DAW's tempo. It is predictable and needs no routing. Sidechain mode follows an actual kick routed to the sidechain input, so the duck follows how hard the kick hits and when it lands. Use SC HP at 80 to 120 Hz so the sub does not over-trigger. Choose Auto for a steady, even pump and Sidechain when you want the duck to react to the performance.
Where can I find more about Pumpit?
On the Pumpit page: its features, system requirements and how to get it.
Related guides
How do I get and install Pumpit?
- Get it. Pumpit is free. Get it from the Pumpit page.
- Run the installer. On macOS, double-click the .pkg file and choose AU, VST3, CLAP, AAX or Standalone. On Windows, run the .exe installer and choose VST3, CLAP or Standalone.
- Open your DAW. Restart your DAW and rescan plugins if needed, then find Pumpit under Remi Blaze in your plugin list.
More about Pumpit, including its features and system requirements, is on the Pumpit page.
Where are the plugin files?
If you need to find Pumpit on disk, for example to troubleshoot or to uninstall it manually, these are the standard locations.
| macOS AU | ~/Library/Audio/Plug-Ins/Components/ |
|---|---|
| macOS VST3 | ~/Library/Audio/Plug-Ins/VST3/ |
| macOS CLAP | ~/Library/Audio/Plug-Ins/CLAP/ |
| macOS AAX | /Library/Application Support/Avid/Audio/Plug-Ins/ |
| Windows VST3 | C:\Program Files\Common Files\VST3\ |
| Windows CLAP | C:\Program Files\Common Files\CLAP\ |
To uninstall, quit your DAW and delete the Pumpit file from the relevant folder. Your DAW will stop listing it on its next rescan.
Need help with Pumpit?
If something isn't covered here, or Pumpit doesn't behave as described, contact support or email support@remiblaze.com. To get an answer faster, include:
- your operating system and version (for example macOS 15.6 or Windows 11)
- your DAW and its version
- the format you're using (AU, VST3, CLAP, AAX or Standalone)
- the Pumpit version, shown in the About panel (click the Fire Head)
- what you did, what you expected, and what happened instead
This manual is for Pumpit 1.0.1. Controls and settings can change between versions, so if something here doesn't match what you see, check which version you have: click the Fire Head to open Pumpit's About panel. Spotted a mistake or have a question? Let us know.