What is Purix?
Purix is a free automatic resonance remover for Mac and Windows. It listens to your audio in real time, finds harsh peaks, muddy buildup and boxy resonances the moment they spike, and turns down just those frequencies until they settle. The rest of the sound passes through as it was.
Purix splits the sound into frequency bins with an FFT and compares each bin with its neighbors and with its own recent level. A bin that rises too far above them is reduced, with its own attack, hold and release. Depth sets how much, Sensitivity sets how far a peak must rise, Low Cut and High Cut limit the band it works in, and five modes tune the detection for different sources. Learn can set the main controls for you in about five seconds.
How does automatic resonance detection and removal work?
An FFT splits the audio into hundreds of frequency bins in real time. Purix compares each bin to its neighbors and to its own recent level. A bin that spikes above the local average is flagged as a resonance, a harsh peak, a boxy buildup or a ringing frequency that stands out from the rest of the spectrum.
Each flagged bin is reduced with its own attack, hold and release, so the reduction follows the resonance tightly and lets go as soon as it settles. The rest of the spectrum passes through untouched. The result is cleaner audio without the broad cuts a static EQ would make.
Quick start
Get a result with Purix in under a minute.
- Insert it. Put Purix on the track or bus you want to process.
- Pick a preset. Open the Presets menu and choose one close to what you want.
- Shape it. Work through the numbered controls below until it sounds right to your ear.
- Listen to the difference. Switch on DELTA to hear only what the plugin is adding, then switch it off.
- Blend to taste. Pull Mix back from 100% if you want a subtler result.
- Compare. Bypass the plugin in your DAW to hear before and after.
The interface
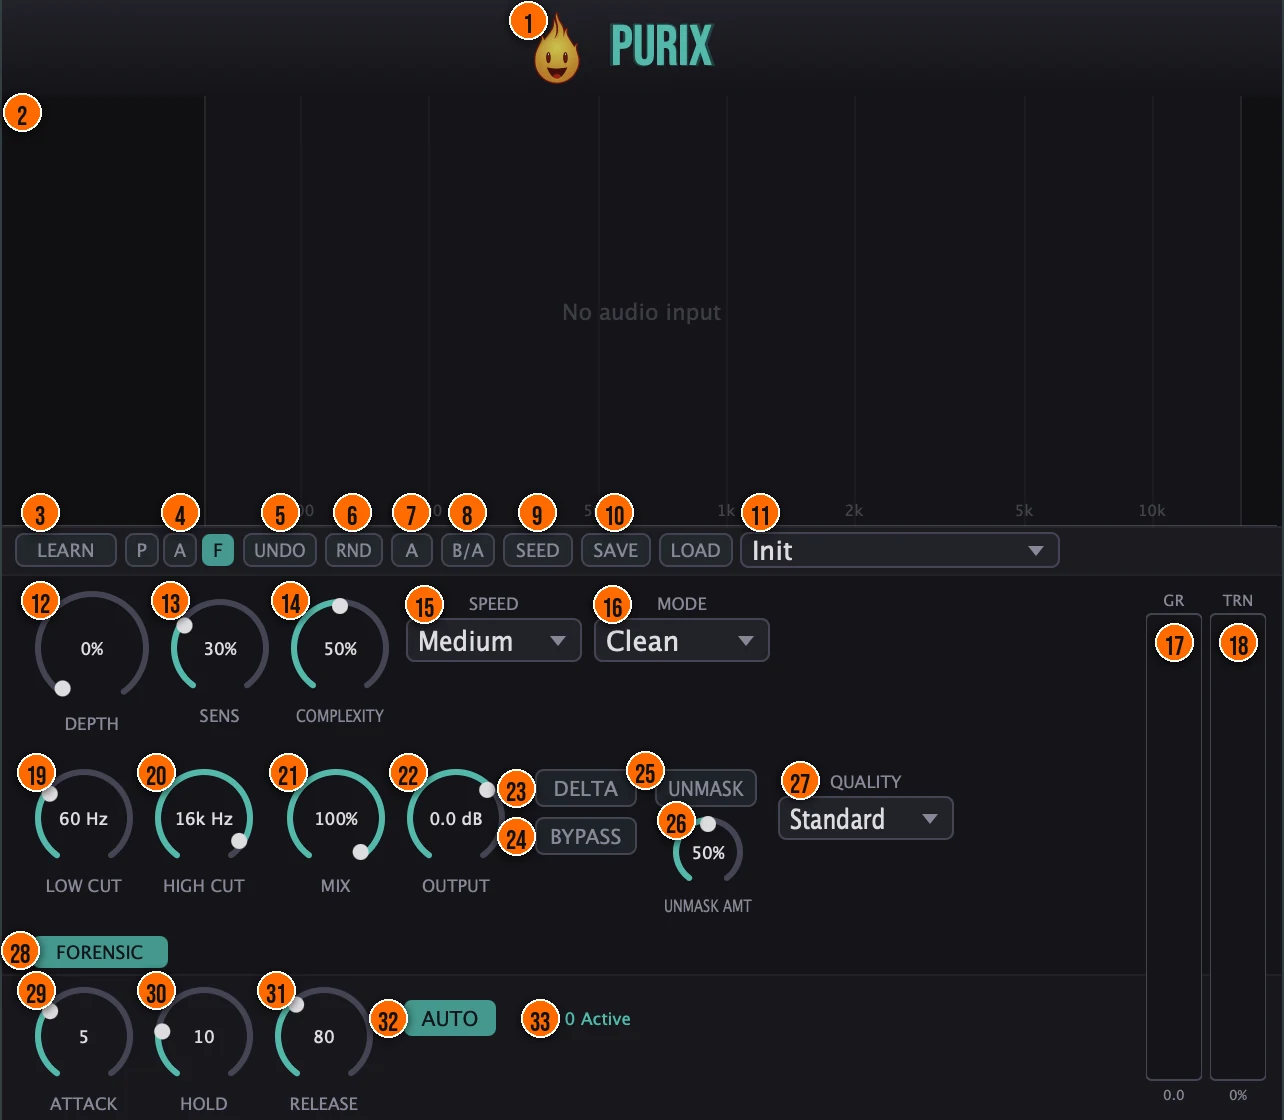
Controls
Top bar
- 1Fire Head: click the flame logo to open the About panel: what the plugin is, who made it, its version and the trademark notices. Click anywhere in the panel to close it.
Learn
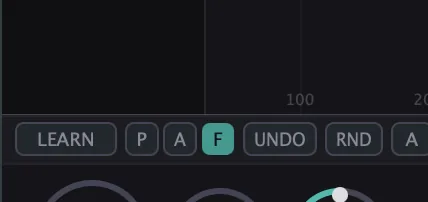
- 3LEARN: play your audio and press it: Purix analyzes the sound for about five seconds, then sets Depth, Sensitivity, the mode and the band for you. A progress ring and a spectral shadow show the profile it captures. It skips silent input and applies a 12 dB safety clamp.Tip Press LEARN and play a representative passage. In about five seconds, Purix sets the main controls for you. Press UNDO if the result is too aggressive.
- 4P / A / F (Learn profiles): how Learn weighs the spectrum. Punch (P) gives less weight to below 100 Hz and above 12 kHz, to protect kick weight and hi-hat air. Aura (A) focuses on 800 Hz to 8 kHz, for vocal harshness and lead resonances. Final (F) weighs the spectrum evenly and caps the depth at 50%, for the master bus.P, A or F; default F
- 5UNDO: restores the settings you had before the last Learn.
Presets, compare and share
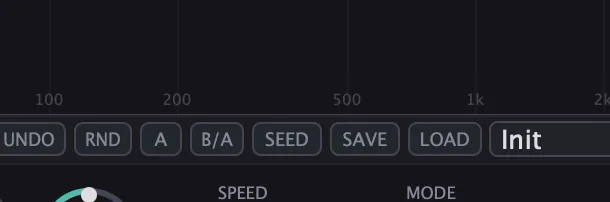
- 6RND (Random): randomizes the settings, for a new starting point.
- 7A (A / B): switches between two full sets of settings, to compare them.
- 8B/A (Before / After): freezes the spectrum on the display, for a direct visual comparison of before and after.
- 9SEED (Cleanup Seed): an 8-character code that captures six key settings: Depth, Sensitivity, Speed, Mode, Low Cut and High Cut. Copy it to share or keep a snapshot, and paste one to restore it.
- 10Save / Load: Save stores the current settings as a .preset file; Load opens a preset file.
- 11Presets: 19 factory presets, from Init and Gentle Cleanup to Vocal De-Ess, Drum De-Box, The Mud-Killer and Sub-Stabilizer.
Detection
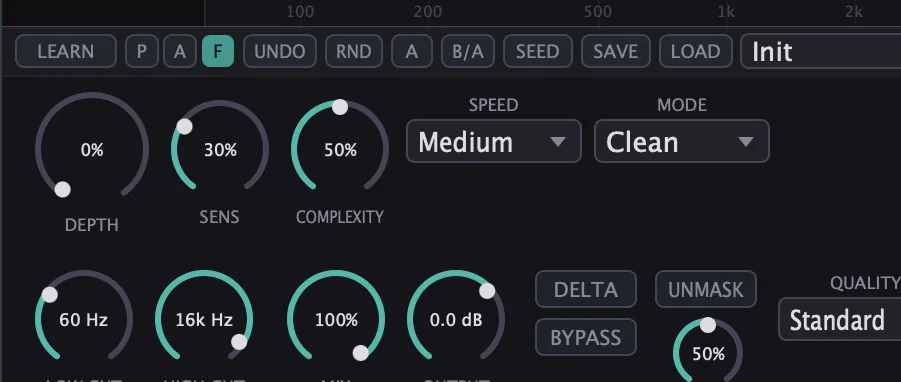
- 12Depth: how much reduction is applied to the resonances Purix finds.0 to 100%Tip Start low and raise Depth until the harshness settles. If the sound starts to lose body, you have gone too far.
- 13Sens (Sensitivity): how far a peak must rise above the surrounding spectrum before Purix treats it as a resonance.0 to 100%Tip Higher Sensitivity catches quieter resonances. Lower values let only the loudest peaks through, for a lighter touch.
- 14Complexity: how readily the detector reacts across the spectrum.0 to 100%
- 15Speed: how fast the detection responds.Slow, Medium or Fast
- 16Mode: the detection profile. Clean is broadband cleanup; Vocal is tuned for sibilance and vocal harshness; Drum targets boxiness and ring; Master is gentle, for the mix bus and mastering. Harmonic tracks the pitch and places the reduction between the harmonics, and it can follow MIDI notes for exact tracking.Clean, Vocal, Drum, Master or HarmonicTip Vocal is tuned for sibilance and upper-midrange harshness. Drum targets boxiness and ring. Master is the gentlest, for the mix bus.
- 27Quality: the FFT resolution: more resolution costs more CPU. Purix reports the latency of each setting to your DAW.Eco (1024), Standard (2048) or High (4096)Tip Standard (2048) suits most material. Switch to Eco for lower CPU during tracking, and High for finer resolution on the final bounce.
Band
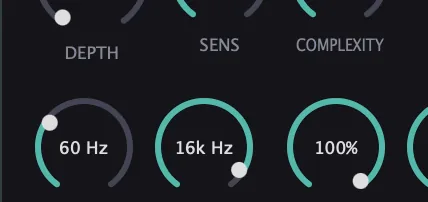
- 19Low Cut: Purix works only above this frequency.20 to 2000 HzTip Raise Low Cut to protect the sub if Purix starts thinning the bass. The sub is rarely where the harsh resonances sit.
- 20High Cut: Purix works only below this frequency.2000 to 20000 Hz
Envelope
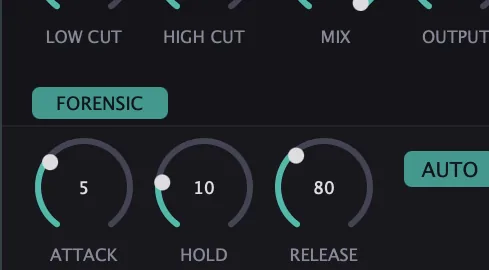
- 28FORENSIC: opens and closes the Forensic panel, the drawer that holds Attack, Hold, Release and Auto Hold.
- 29Attack: how fast the reduction comes in when a resonance appears.0.1 to 50 ms
- 30Hold: how long the reduction holds before it releases.0 to 500 ms
- 31Release: how fast the reduction lets go once the resonance subsides.5 to 1000 ms
- 32AUTO (Auto Hold): scales the hold time for each frequency automatically: shorter at high frequencies, to keep transient detail, and longer at low frequencies, to stop the sub from fluttering.On or off, default on
Output and monitoring
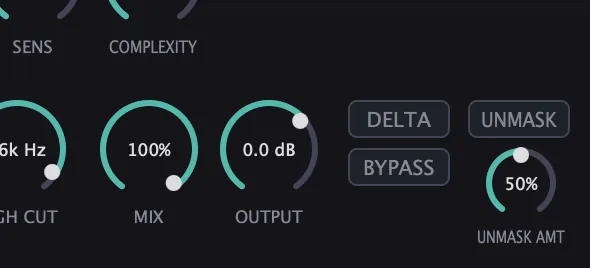
- 21Mix: blends the cleaned sound with the dry signal, for parallel cleanup.0 to 100%
- 22Output: the level leaving Purix.−12 to +6 dB
- 23DELTA: plays only what Purix is removing, so you can check it isn't taking too much.Tip Press DELTA to hear only what Purix is removing. You should hear thin, whistling resonances, not the body of the sound.
- 24BYPASS: one-click comparison against the unprocessed signal.
- 25UNMASK: spectral ducking driven by Purix's own sidechain input, to reduce frequency masking between the sidechain source and your track.Tip Route a competing sound to the sidechain and turn on UNMASK. Purix ducks the frequencies where the two tracks mask each other.
- 26Unmask Amt: how much Unmask ducks.
Meters and displays
- 2Spectrum display: the real-time spectrum of your audio on a frequency grid (100 Hz to 10 kHz are marked), where the resonances Purix detects appear. You can also solo any band from here to hear it on its own (Frequency Solo). It reads "No audio input" until audio plays.
- 17GR meter: the average gain reduction, in dB, on a 0 to −18 dB scale.
- 18TRN (Knock meter): how transient the signal is, from 0 to 100%.
- 33Active: the number of active suppression regions: how many resonance groups Purix is reducing right now.
Key specs*
| Engine | Overlap-add FFT, Hann window, 75% overlap |
|---|---|
| FFT sizes | 1024 (Eco), 2048 (Standard), 4096 (High) |
| Latency | Reported to your DAW for each Quality setting |
| Detection | Per-bin attack, hold and release; 8-frame smoothing; sub-bin peak interpolation; 3 dB hysteresis |
| Harmonic mode | Pitch tracking, with MIDI Pitch Override |
| Envelope | Attack 0.1 to 50 ms, Hold 0 to 500 ms, Release 5 to 1000 ms |
| Learn | About 5 seconds; 12 dB safety clamp; one-step Undo |
| Output | −12 to +6 dB, DC blocker |
| MIDI | Accepts MIDI input for Harmonic mode pitch override |
| Factory presets | 19 |
* Key specs from the plugin page. Some specs may not be listed.
How does the sound flow through Purix?
A simplified view of the main path.
Learn sets the main controls automatically in about five seconds. UNMASK ducks frequencies that mask the sidechain source, and Delta plays only what is being removed.
How do I clean up a harsh synth lead with Learn?
- Load it. Put Purix on the lead track.
- Pick the profile. Press A (Aura), which focuses Learn on 800 Hz to 8 kHz, where lead resonances usually sit.
- Learn. Play the lead and press LEARN. After about five seconds, Purix sets Depth, Sensitivity, the mode and the band.
- Listen to what goes. Press DELTA to hear only what Purix removes. You should hear thin, whistling peaks, not the body of the lead. Press it again to return.
- Fine-tune. Adjust Depth by ear. If you prefer how it was, press UNDO to go back to your settings before Learn.
- Blend. Lower Mix for a lighter touch, and use BYPASS to compare.
How do I remove boxiness from a drum bus with Purix?
- Load it. Put Purix on the drum bus.
- Set the mode. Set Mode to Drum, which is tuned for boxiness and ring.
- Learn it. Press P (Punch profile) so Learn protects the sub and the air, then press LEARN and play a full loop.
- Check the result. Press DELTA to hear what is being removed. It should be boxy midrange ring, not kick weight or hi-hat detail.
- Fine-tune. Adjust Depth by ear. Raise Low Cut if the sub starts thinning.
- Blend. Lower Mix for a lighter touch, and use BYPASS to compare.
What about Purix Raw?

Purix Raw is the free one-knob version, on the same engine. Its PURIFY knob drives the depth, the detection sensitivity and the automatic makeup gain together, from gentle cleanup at low settings to a firmer pass near the top, and the makeup keeps the level matched. Below roughly 150 Hz the left and right channels are processed together, so the low end stays mono-safe, and its reported latency never changes. Its own manual: Purix Raw manual.
Purix vs. Purix Raw
A side-by-side look at what each version includes.
| Feature | Purix | Purix Raw |
|---|---|---|
| Presets | Included | Not included |
| Oversampling control | Included | Not included |
| Mix (dry/wet) | Included | Not included |
| Output level | Included | Not included |
| Delta / listen mode | Included | Not included |
Keyboard and mouse shortcuts
These work in every Purix format (AU, VST3, CLAP, AAX, Standalone).
| Reset a control to its default | Double-click the knob or slider |
|---|---|
| Scroll to change a value | Hover over a knob and scroll the mouse wheel |
Frequently Asked Questions
Which Learn profile should I choose?
Punch (P) for drums and full beats, because it leaves the sub and the top air alone. Aura (A) for vocals and leads, because it focuses on 800 Hz to 8 kHz. Final (F) for the master bus, because it caps the depth at 50%. F is the default.
Which Quality setting should I use?
Standard (2048) suits most material. Eco (1024) saves CPU, and High (4096) gives finer frequency resolution at a higher CPU cost. The latency changes with the setting, and Purix reports it to your DAW, which compensates for it.
What does Unmask do?
It uses Purix's sidechain input to duck the frequencies where another sound and your track mask each other. Route the other sound to the sidechain, turn on UNMASK and set the amount with Unmask Amt.
What is a Cleanup Seed?
A short code, 8 characters, that holds six settings: Depth, Sensitivity, Speed, Mode, Low Cut and High Cut. Copy it to keep or share a cleanup, and paste one to bring those settings back.
Where can I find more about Purix?
On the Purix page: its features, system requirements and how to get it.
How do I get and install Purix?
- Get it. Purix is free. Get it from the Purix page.
- Run the installer. On macOS, double-click the .pkg file and choose AU, VST3, CLAP, AAX or Standalone. On Windows, run the .exe installer and choose VST3, CLAP or Standalone.
- Open your DAW. Restart your DAW and rescan plugins if needed, then find Purix under Remi Blaze in your plugin list.
More about Purix, including its features and system requirements, is on the Purix page.
Where are the plugin files?
If you need to find Purix on disk, for example to troubleshoot or to uninstall it manually, these are the standard locations.
| macOS AU | ~/Library/Audio/Plug-Ins/Components/ |
|---|---|
| macOS VST3 | ~/Library/Audio/Plug-Ins/VST3/ |
| macOS CLAP | ~/Library/Audio/Plug-Ins/CLAP/ |
| macOS AAX | /Library/Application Support/Avid/Audio/Plug-Ins/ |
| Windows VST3 | C:\Program Files\Common Files\VST3\ |
| Windows CLAP | C:\Program Files\Common Files\CLAP\ |
To uninstall, quit your DAW and delete the Purix file from the relevant folder. Your DAW will stop listing it on its next rescan.
Need help with Purix?
If something isn't covered here, or Purix doesn't behave as described, contact support or email support@remiblaze.com. To get an answer faster, include:
- your operating system and version (for example macOS 15.6 or Windows 11)
- your DAW and its version
- the format you're using (AU, VST3, CLAP, AAX or Standalone)
- the Purix version, shown in the About panel (click the Fire Head)
- what you did, what you expected, and what happened instead
This manual is for Purix 1.1.0. Controls and settings can change between versions, so if something here doesn't match what you see, check which version you have: click the Fire Head to open Purix's About panel. Spotted a mistake or have a question? Let us know.