What is Hazex?
Hazex is a free algorithmic stereo reverb for Mac and Windows. It goes from a tight room to a long shimmering hall, and it can duck out of the way of your drums or vocal and keep its low end mono, so the tail moves with the track instead of muddying it.
Your sound first passes through a four-stage diffuser, then into a network of eight feedback delay lines, where Shimmer and SAT-LINK work inside the loop. A tone shelf follows the reverb, and the wet signal is blended with the dry and protected at the output by a soft clipper and a limiter.
How does a feedback delay network work?
An algorithmic reverb builds its tail from delay lines that feed back into each other. Hazex uses eight of them, with prime-length delays scaled to your sample rate so the echoes don't line up into a metallic ring. A mixing matrix spreads the energy evenly across all eight lines, so the tail grows dense and smooth.
Before the tail starts, a 4-stage all-pass diffuser smears transients into a cloud. Inside the feedback loop, SAT-LINK can saturate the tail and Shimmer can pitch it up an octave, so each pass around the loop adds a little more. Haziness moves the delay lines with 8 LFOs, so the tail never sits still.
Quick start
Get a result with Hazex in under a minute.
- Insert it. Put Hazex on the track or bus you want to process.
- Pick a preset. Open the Presets menu and choose one close to what you want.
- Shape it. Work through the numbered controls below until it sounds right to your ear.
- Blend to taste. Pull Mix back from 100% if you want a subtler result.
- Compare. Bypass the plugin in your DAW to hear before and after.
The interface
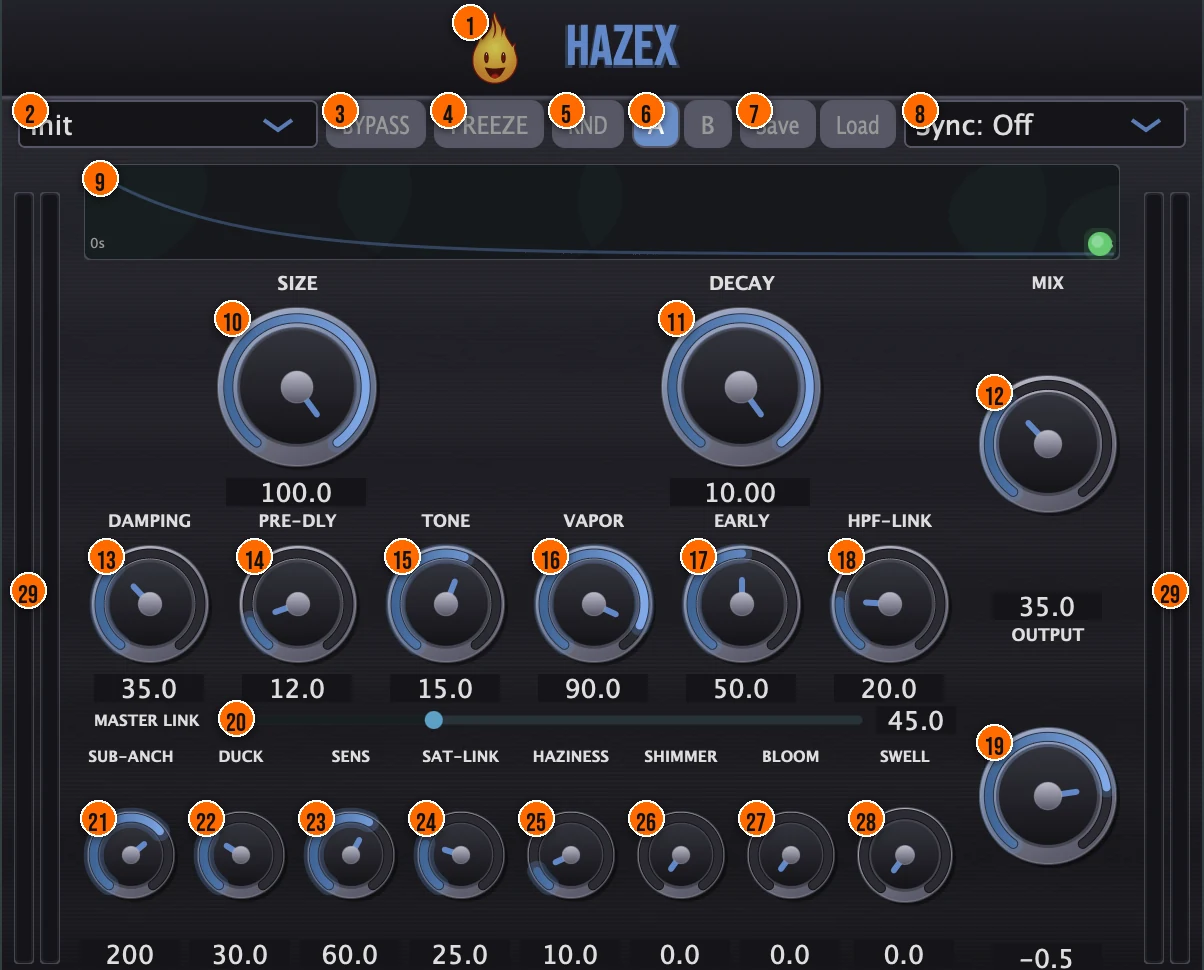
Controls
Top bar
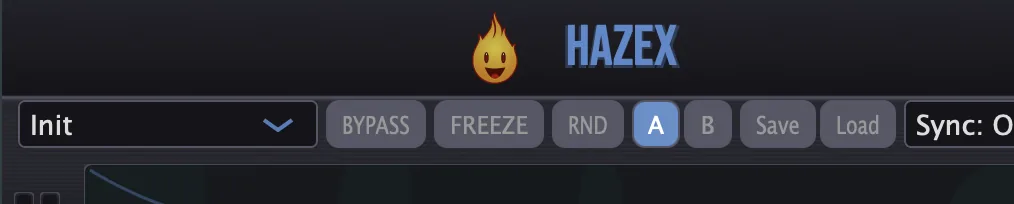
- 1Fire Head: click the flame logo to open the About panel: what the plugin is, who made it, its version and the trademark notices. Click anywhere in the panel to close it.
- 2Presets: 21 factory presets, from Forensic Room and Vocal Plate to Cathedral, Ghost Clap and Remi Blaze Space.
- 3Bypass: bypasses all processing, for comparing against the dry signal.On or off
- 4Freeze: infinite sustain: holds the current tail.On or off, default offTip Press Freeze at the end of a phrase to hold the tail under a break, then release it when the next section starts.
- 5RND (Randomize): new settings at random.
- 6A / B: compare two versions of your settings.
- 7Save / Load: save your own presets, or load them back.
- 8Sync: Pre-Delay Sync: locks the pre-delay to your DAW's tempo.Off, 1/64, 1/32, 1/16 or 1/8; default offTip With Sync on, Pre-Dly is set in note values from 1/64 to 1/8, so the reverb starts in time with the groove.
The space
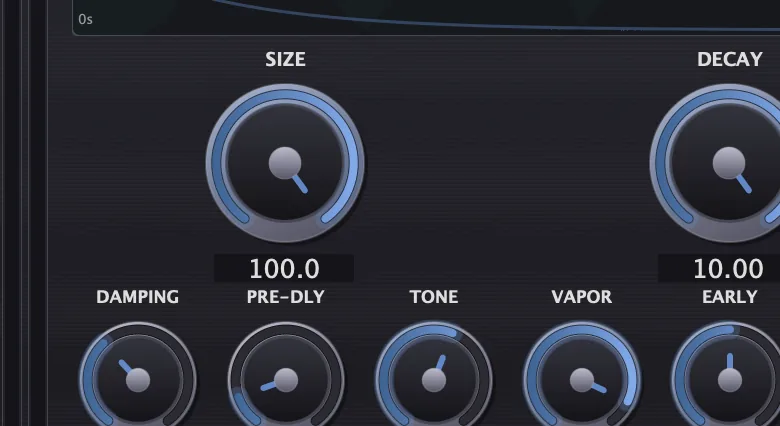
- 10Size: scales the delay lines, from a tight room to a large space.0 to 100%, default 40%
- 11Decay: how long the tail lasts. Hazex compensates the level, so longer tails don't sound louder.0.1 to 10 seconds (RT60), default 1.0 sTip Hazex compensates the level as Decay changes, so you can compare a short and a long tail by ear without the longer one winning just because it's louder.
- 13Damping: how much high end the tail absorbs as it decays: higher is darker.0 to 100%, default 28%
- 14Pre-Dly (Pre-Delay): the gap between the dry sound and the start of the reverb. Use Sync to set it in note values instead.0 to 100 ms, default 18 ms
- 15Tone: a high shelf after the reverb, for a darker or brighter tail.−100% to +100%, default +20%Tip On pads and atmospheres, a longer Decay with a darker Tone (below 0%) pushes the sound back in the mix. On a lead, a shorter Decay with a brighter Tone keeps it up front. To tighten the space for a drop, automate Decay shorter.
- 16Vapor: stereo width, from mono-compatible to full stereo.0 to 100%, default 80%
- 17Early: the balance between early reflections and the late tail.0 to 100%, default 55%
Movement and character
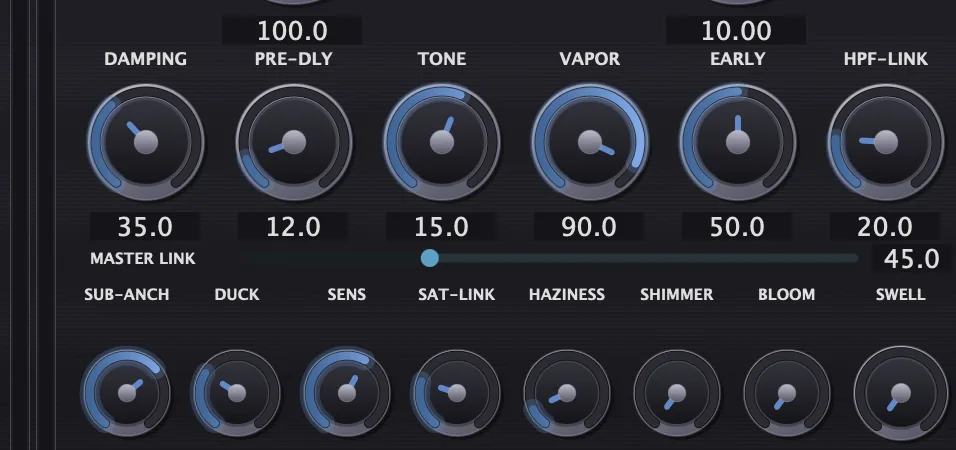
- 18HPF-LINK: a high-pass on the tail that moves with the input level, so the reverb breathes. The sweep reaches up to three octaves.0 to 100%, default 0%Tip If the tail muddies the mix, try HPF-LINK, Damping and Tone before you shorten Decay. Each one keeps the tail from building up while it keeps its length.
- 20Master Link: one slider that scales SAT-LINK, HPF-LINK and the ducking sensitivity together, up to 150%.0 to 150%, default 0%Tip Master Link moves SAT-LINK, HPF-LINK and the ducking sensitivity together, so one slider makes the whole reverb react more or less to your input.
- 21Sub-Anch (Sub-Anchor): keeps the low end of the reverb tight and phase-safe on club systems, with a 24 dB/octave Linkwitz-Riley crossover.20 to 500 Hz, default 100 HzTip On music for club systems, use Sub-Anch so whatever low end the tail keeps stays in mono and phase-safe.
- 22Duck (Ghost Ducking): an internal sidechain that ducks the wet signal under loud transients and lets the tail bloom back when the input quiets. A 3 ms lookahead lets it react before the hit.0 to 100%, default 15%Tip Duck has a 3 ms lookahead, so it reacts to a hit before it arrives. Raise it on drums or vocals to keep a big tail without blurring the hits.
- 23Sens: how readily the ducking responds to the input level.0 to 100%, default 50%
- 24SAT-LINK: drives the tail into saturation as it feeds back. It follows the input level and compensates the gain.0 to 100%, default 0%
- 25Haziness: LFO modulation of the delay lines (8 independent LFOs), so the tail keeps moving.0 to 100%, default 8%
- 26Shimmer: pitch-shifted feedback for an octave-up shimmer that builds up in the tail.0 to 100%, default 0%; +12 semitonesTip Shimmer works inside the feedback loop, so the octave builds up as the tail repeats. On long tails, a low setting is often enough.
- 27Bloom (Reverse Bloom): a reversed, grain-based tail that pulls backwards into the sound, for tension.0 to 100%, default 0%
- 28Swell: an upward swell of the reverb, synced to the bar, for building into the next section.0 to 100%, default 0%
Output
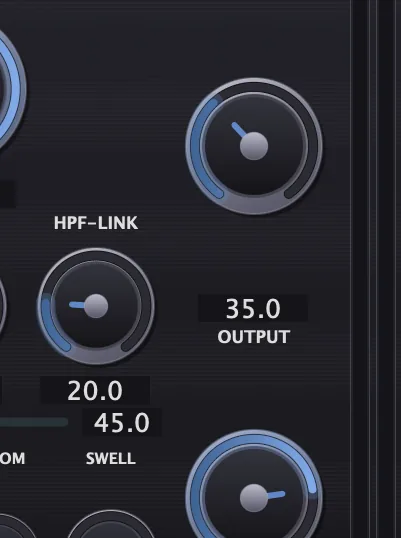
- 12Mix: blends the reverb with the dry signal.0 to 100%, default 25%
- 19Output: the level leaving Hazex.−24 to +6 dB, default −0.5 dB
Meters and displays
- 9Display: Hazex's visual feedback while the reverb plays. Hazex also has a Nebula visualizer, a swell tracker and a Phase Guard correlation LED.
- 29Level meters: the stereo level meters down the left and right edges.
Key specs*
| Engine | 8-line feedback delay network, Householder matrix, prime delay lengths scaled to the sample rate |
|---|---|
| Diffuser | 4-stage all-pass, before the tank |
| Interpolation | 4-point Hermite on every delay read |
| Decay | 0.1 to 10 s (RT60), with dynamic gain compensation |
| Pre-delay | 0 to 100 ms, or synced to 1/64, 1/32, 1/16 or 1/8 |
| Shimmer | +12 semitones, in the feedback loop |
| Ghost Ducking | 3 ms lookahead |
| HPF-LINK | Up to a 3-octave sweep |
| Sub-Anchor | Linkwitz-Riley, 24 dB/octave, 20 to 500 Hz |
| Output | Soft clipper and hard limiter, DC blocking |
| Factory presets | 21 |
* Key specs from the plugin page. Some specs may not be listed.
How does the sound flow through Hazex?
A simplified view of the main path.
Ghost Ducking, HPF-LINK and Sub-Anchor shape the wet signal along the way.
What does Hazex's reverb look like over time?
These sketches show level over time for one hit through Hazex. Gray is the dry sound and orange is the reverb tail. They show the idea, not exact measurements.
Pre-delay and decay
Pre-Dly sets the gap between the dry hit and the start of the reverb, from 0 to 100 ms. Decay sets how long the tail takes to fall 60 dB (RT60), from 0.1 to 10 seconds. With Sync on, the gap is a note value at your DAW's tempo instead, so the tail starts in time with the groove.
With Sync on, Hazex works the gap out from the tempo, so it can run past 100 ms: at 120 BPM, 1/16 is 125 ms and 1/8 is 250 ms.
How do I make a vocal reverb that ducks under the vocal?
- Start from a plate. Load Hazex on the vocal and pick the Vocal Plate preset.
- Set the length. Turn Decay to the tail length you want, and Size for the space.
- Give it a gap. Raise Pre-Dly so the vocal is heard before the reverb starts, or set Sync to a note value such as 1/16.
- Duck it. Turn up Duck so the reverb drops under the vocal, and adjust Sens until it reacts to the phrases, not every breath.
- Keep it clean. Use HPF-LINK, Damping and Tone so the tail doesn't build up, and Sub-Anch to keep any low end in mono.
- Blend. Set Mix for the amount of reverb, and match the level with Output.
How do I build a reverse swell into a new section with Hazex?
- Load it. Put Hazex on the part that leads into the new section.
- Set a long tail. Turn Decay up for a long tail, and Size up for a large space.
- Add the reverse tail. Raise Bloom for a reversed tail that pulls backwards into the sound.
- Swell into the section. Raise Swell for an upward swell of the reverb, synced to the bar.
- Hold the tail. Press Freeze on the last beat before the new section to hold the tail, and release it when the section starts.
- Set the level. Set Mix for the amount of reverb, and match the level with Output.
How do I use Hazex on a send?
- Load it on a send. Put Hazex on a send or aux track, and send the tracks you want to it.
- Run it fully wet. Set Mix to 100%. The dry sound already comes from each track, so the send only needs the reverb.
- Set the amount. Set how much reverb each track gets with its send level.
On an insert: Mix sets the blend
On a send: Mix at 100%, send levels set the amount
On a send, one Hazex serves every track that feeds it. The dry sound stays on each track, so the return only adds reverb.
What about Hazex Raw?
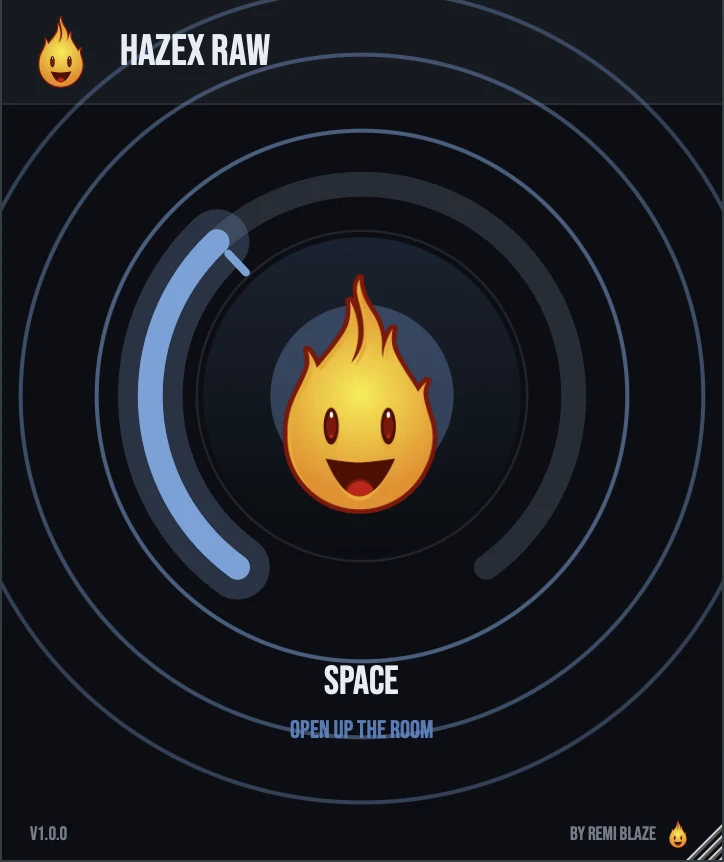
Hazex Raw is the free one-knob version, on the same reverb engine. Its SPACE knob moves size, decay, width and mix together, from a small room at low settings to a wide ambient wash at the top, and it keeps the level matched as you turn it. It reports zero latency. Its own manual: Hazex Raw manual.
Hazex vs. Hazex Raw
A side-by-side look at what each version includes.
| Feature | Hazex | Hazex Raw |
|---|---|---|
| Presets | Included | Not included |
| Randomize | Included | Not included |
| Mix (dry/wet) | Included | Not included |
| Output level | Included | Not included |
Keyboard and mouse shortcuts
These work in every Hazex format (AU, VST3, CLAP, AAX, Standalone).
| Reset a control to its default | Double-click the knob or slider |
|---|---|
| Scroll to change a value | Hover over a knob and scroll the mouse wheel |
| Type an exact value | Click the value below a knob and type a number |
Frequently Asked Questions
What does Master Link do?
It scales SAT-LINK, HPF-LINK and the ducking sensitivity together, up to 150%, so you can make the reverb react more or less to the input with one move.
What is the difference between Freeze and a long Decay?
Decay goes up to 10 seconds and then the tail fades. Freeze holds the current tail with infinite sustain until you switch it off.
What does SAT-LINK add?
Saturation inside the reverb's feedback loop, driven by the input level, with gain compensation, so the tail picks up warmth and grit as you play harder.
How do I make the reverb breathe with the track?
Combine Duck, which drops the reverb under loud hits, with HPF-LINK, which moves a high-pass on the tail with the input level.
Where can I find more about Hazex?
On the Hazex page: its features, system requirements and how to get it.
Related guides
How do I get and install Hazex?
- Get it. Hazex is free. Get it from the Hazex page.
- Run the installer. On macOS, double-click the .pkg file and choose AU, VST3, CLAP, AAX or Standalone. On Windows, run the .exe installer and choose VST3, CLAP or Standalone.
- Open your DAW. Restart your DAW and rescan plugins if needed, then find Hazex under Remi Blaze in your plugin list.
More about Hazex, including its features and system requirements, is on the Hazex page.
Where are the plugin files?
If you need to find Hazex on disk, for example to troubleshoot or to uninstall it manually, these are the standard locations.
| macOS AU | ~/Library/Audio/Plug-Ins/Components/ |
|---|---|
| macOS VST3 | ~/Library/Audio/Plug-Ins/VST3/ |
| macOS CLAP | ~/Library/Audio/Plug-Ins/CLAP/ |
| macOS AAX | /Library/Application Support/Avid/Audio/Plug-Ins/ |
| Windows VST3 | C:\Program Files\Common Files\VST3\ |
| Windows CLAP | C:\Program Files\Common Files\CLAP\ |
To uninstall, quit your DAW and delete the Hazex file from the relevant folder. Your DAW will stop listing it on its next rescan.
Need help with Hazex?
If something isn't covered here, or Hazex doesn't behave as described, contact support or email support@remiblaze.com. To get an answer faster, include:
- your operating system and version (for example macOS 15.6 or Windows 11)
- your DAW and its version
- the format you're using (AU, VST3, CLAP, AAX or Standalone)
- the Hazex version, shown in the About panel (click the Fire Head)
- what you did, what you expected, and what happened instead
This manual is for Hazex 1.1.0. Controls and settings can change between versions, so if something here doesn't match what you see, check which version you have: click the Fire Head to open Hazex's About panel. Spotted a mistake or have a question? Let us know.