What is Oxidex?
Oxidex is an analog tape saturation plugin for Mac and Windows. It models reel-to-reel tape: magnetic hysteresis, a resonant head bump, wow and flutter, and wear, so you can go from a pristine studio reel to a worn cassette sound.
Pick a tape speed, then set Drive for the saturation, Head Bump for weight in the low end and Tone to darken or brighten it. Wear ages the tape, Snap keeps drum attacks alive through heavy drive, and Auto Gain matches the level so you hear character, not volume. Tape Stop and Motor Pressure are performance effects for transitions.
How does tape saturation work?
Tape saturation models what happens when audio is recorded to magnetic tape. The tape oxide responds differently at different frequencies, so bass saturates more than treble. The recording head adds a resonant bump in the low end, and the tape speed affects where that bump sits and how much high-frequency detail the tape holds. Heavier drive pushes the tape harder, adding warmth, compression and harmonic color.
Quick start
Get a result with Oxidex in under a minute.
- Insert it. Put Oxidex on the track or bus you want to process.
- Pick a preset. Open the Presets menu and choose one close to what you want.
- Shape it. Work through the numbered controls below until it sounds right to your ear.
- Blend to taste. Pull Mix back from 100% if you want a subtler result.
- Compare. Bypass the plugin in your DAW to hear before and after.
The interface
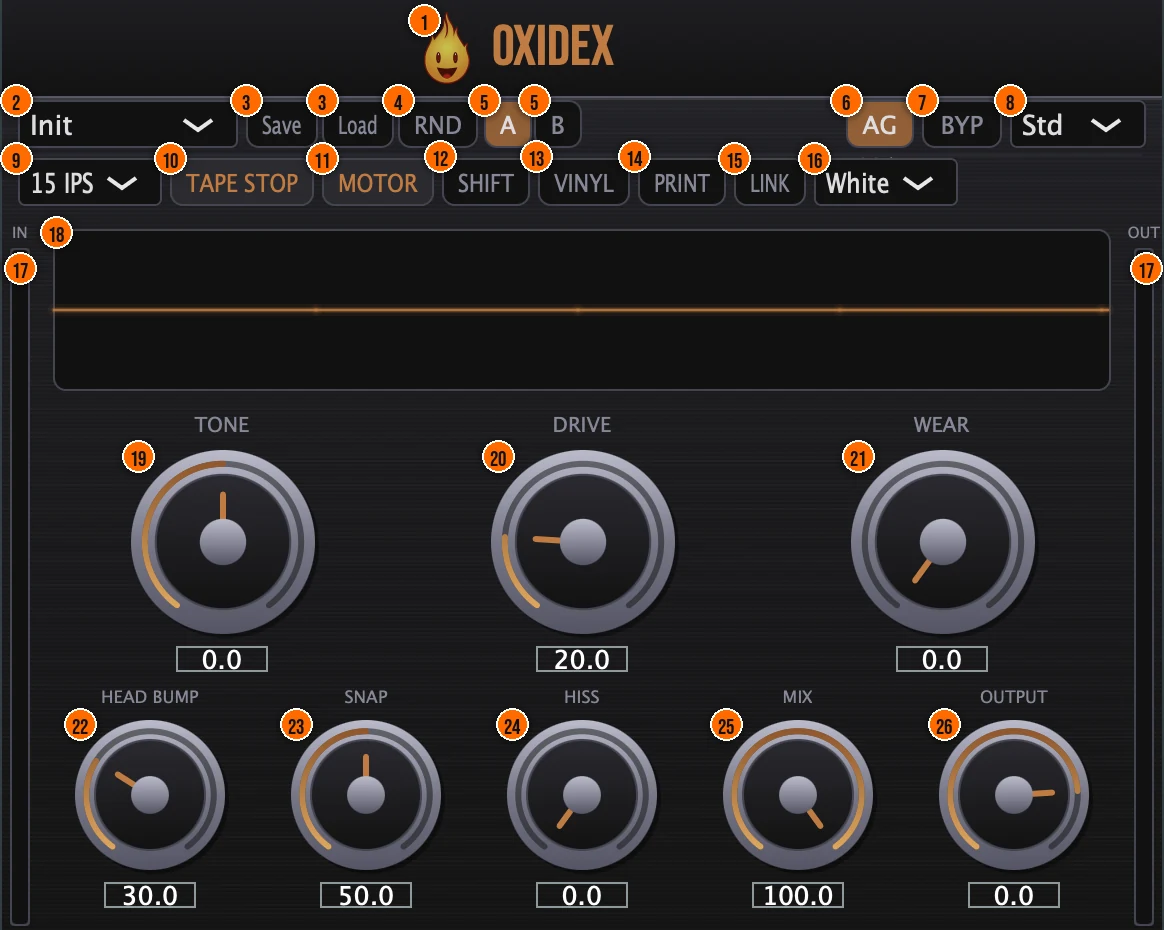
Controls
Top bar

- 1Fire Head: click the flame logo to open the About panel: what the plugin is, who made it, its version and the trademark notices. Click anywhere in the panel to close it.
- 2Presets: 22 factory presets, from Subtle Warmth and Studio Reel to Drum Punch, Lo-Fi Cassette, Warehouse Master and Remi Blaze Oxidex.
- 3Save / Load: save your own presets, or load them back.
- 4RND (Randomize): new settings at random.
- 5A / B: compare two versions of your settings.
- 6AG (Auto Gain): matches the level, with about 100 ms of RMS smoothing, so a comparison with bypass is volume-neutral and you hear character, not loudness.Tip Switch on AG to compare the tape color by ear without being fooled by volume changes.
- 7BYP (Bypass): switches the effect off, for comparing against the dry signal.
- 8Quality: the oversampling of the saturation.Draft (2x), Std (4x) or HQ (8x)
Tape and performance

- 9Tape speed: each speed changes the saturation character, the head bump frequency and the high-end rolloff together: 7.5 IPS for vintage warmth, 15 IPS for a classic studio sound, 30 IPS for hi-fi.7.5, 15 or 30 IPSTip 7.5 IPS for vintage warmth with more bass saturation. 30 IPS for a cleaner, hi-fi sound.
- 10Tape Stop: slows the audio to silence with a quadratic friction curve. Press it again (Tape Start) and the tape spins back up, with a slight wobble as it locks to full speed.Tip Automate Tape Stop for a classic slowdown effect into a drop or a transition.
- 11Motor (Motor Pressure): hold to engage a flanger, a 4x Drive boost and a 200 Hz high-pass, for industrial buildups. Let go and the sound returns to your settings.
- 12Shift (Tape Speed Shift): switches the tape speed between 7.5 and 30 IPS, with a smooth glide from one speed to the other.
- 13Vinyl (Vinyl Mode): switches Vinyl Mode on or off: a resonant high-pass around 70 Hz and a 4 dB presence peak at 10 kHz on the processed signal, faded in smoothly so there is no pop.
- 14Print (Print to Tape): switches Print to Tape on or off: a smoothed drive boost of up to +150% into the tape stage, before the saturation.
- 15Link: Drive-Output LINK: couples Drive and Output, for a pure character A/B comparison.
- 16Hiss color: the color of the tape hiss. Brownian is darker, with a −6 dB/octave noise floor.White or Brownian
Tone and saturation
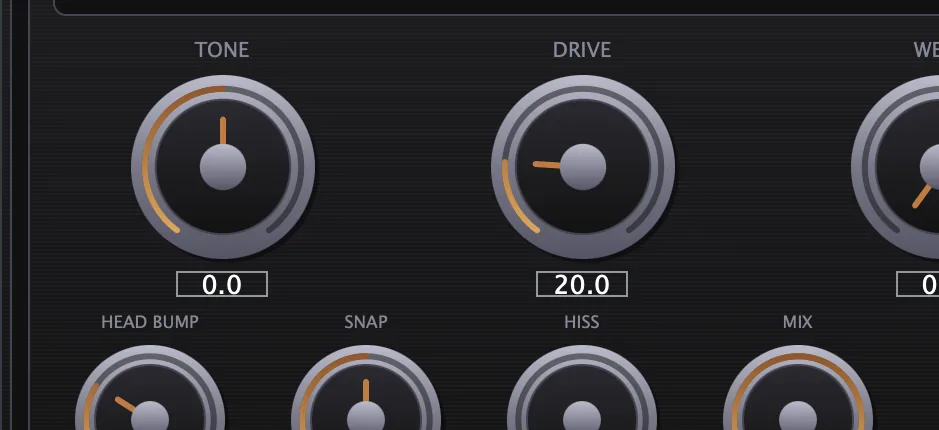
- 19Tone: a tilt EQ pivoting at 1 kHz: darkens or brightens the overall tone in one move.Tip Tone is a tilt EQ pivoting at 1 kHz. Tilt it dark for warmth or bright for presence.
- 20Drive: how hard the tape is driven. The hysteresis model saturates the lows more than the highs, as real tape does.Tip Low Drive (under 30%) adds subtle warmth. Higher Drive compresses and colors the signal more. On a bass that already runs through another saturator, put Oxidex after it with low Drive: two light stages usually sound smoother than one stage pushed hard.
- 21Wear: one control for wow and flutter, spectral aging (a rolloff from 20 kHz down to 4 kHz) and tape dropouts, which appear above 50%. Leave it at zero for clean tape saturation.Tip Wear adds wow, flutter and tape dropouts. A little adds character; a lot sounds like a damaged tape.
- 22Head Bump: a low-shelf boost at the tape speed's head bump frequency: 60 Hz at 7.5 IPS, 80 Hz at 15 IPS, 100 Hz at 30 IPS.Up to +8 dBTip Head Bump boosts the sub at a frequency that depends on the tape speed. It thickens kicks and bass.
- 23Snap (Transient Snap): detects kick and snare attacks and blends clean signal back in at the transient, so drums stay punchy through heavy Drive.Tip Raise Snap to recover the attack that heavy Drive takes away, keeping kicks and snares punchy.
- 24Hiss: the amount of tape hiss, with stereo decorrelation and a silence gate.Tip A little Hiss fills the silence between notes and makes digital sources feel more analog.
Output
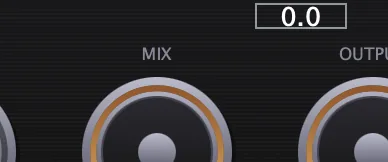
- 25Mix: the dry/wet blend, for parallel saturation.0 to 100%, default 100%Tip Pull Mix back for parallel tape processing: the warmth of tape blended with the clarity of the dry signal.
- 26Output: the level leaving Oxidex. Link (15) couples it to Drive.
Meters and displays
- 17IN / OUT meters: the input level at the left and the output level at the right, with green, yellow and red zones.
- 18Flux Meter: renders the waveform in three layers, bloom, heat and core, that respond to the saturation in real time. The waveform compresses visually as the saturation increases.
Key specs*
| Saturation | Magnetic hysteresis model, heavier saturation in the lows |
|---|---|
| Tape speeds | 7.5 IPS (60 Hz head bump), 15 IPS (80 Hz), 30 IPS (100 Hz) |
| Oversampling | Draft 2x, Standard 4x, HQ 8x |
| Head Bump | Up to +8 dB |
| Tone | Tilt EQ, 1 kHz pivot |
| Wear | Wow and flutter, spectral aging from 20 kHz to 4 kHz, dropouts above 50% |
| Hiss | White or Brownian |
| Crosstalk | −40 dB between channels |
| Auto Gain | About 100 ms RMS smoothing |
| Latency | 1.5 ms fixed lookahead; always reports the HQ latency, for gapless quality switching |
| Parameter smoothing | 20 ms |
| Factory presets | 22 |
* Key specs from the plugin page. Some specs may not be listed.
How does the sound flow through Oxidex?
A simplified view of the main path.
Snap blends the clean signal back at transients so drums keep their attack. Tape Stop, Motor Pressure and Shift are performance effects for transitions.
What does Tone do to the frequency response?
Tone is a tilt EQ that turns around 1 kHz. Turn it down and the lows rise while the highs fall; turn it up and the reverse happens. At either end of the range the lows move by 6 dB.
This shows the shape of the tilt, not an exact measurement; the top end varies a little with sample rate. The two curves cross at 1 kHz, a little above 0 dB at full Tone, because the low and high halves overlap there. Tape speed adds its own high-frequency rolloff and head bump on top of this.
How do I use Oxidex for a tape stop into a drop?
- Load it. Put Oxidex on your main output or an FX bus, and set the tape speed, Drive and Wear for the section.
- Stop the tape. At the end of the phrase, press Tape Stop. The audio slows fast at first, then crawls to silence.
- Spin it up. Let the silence hold a beat, then press the same button again to spin the tape back up.
- Build pressure. While the tape spins up, hold Motor to add the flanger and the Drive boost.
- Drop. Let go of Motor exactly on the drop, and the sound snaps back to your settings.
- Automate it. Automate Tape Stop and Motor Pressure in your DAW for precise timing.
How do I get a vintage drum bus sound with Oxidex?
- Insert it. Put Oxidex on your drum bus.
- Choose 15 IPS. Set the tape speed to 15 IPS for a classic studio sound.
- Drive it gently. Set Drive around 30 to 40%. The tape compresses the peaks and adds warmth.
- Boost the low end. Raise Head Bump to thicken the kick without EQ.
- Recover the snap. Raise Snap until the snare attack comes back through the tape compression.
- Add character. Turn Wear up slightly for subtle wow and flutter, then add a touch of Hiss.
What about Oxidex Raw?
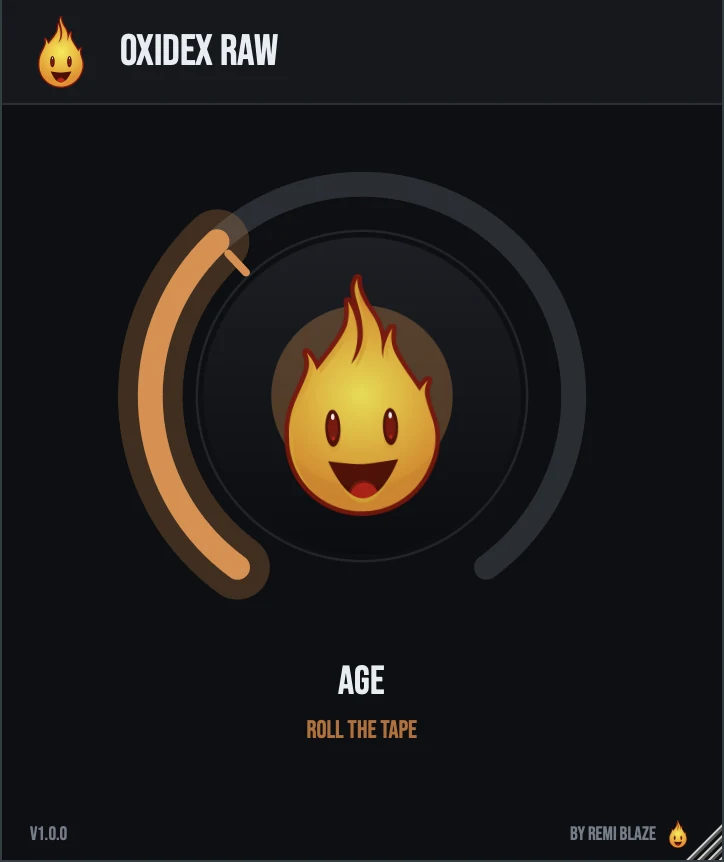
Oxidex Raw is the free one-knob version. Turn its AGE knob up and the tape ages: warmth builds into heavier saturation, the head bump grows, the highs roll off and a touch of hiss eases in. It runs at HQ (8x) with auto-gain always on, so you hear character, not just more volume. Its own manual: Oxidex Raw manual.
Oxidex vs. Oxidex Raw
A side-by-side look at what each version includes.
| Feature | Oxidex | Oxidex Raw |
|---|---|---|
| Presets | Included | Not included |
| Randomize | Included | Not included |
| Oversampling control | Included | Not included |
| Mix (dry/wet) | Included | Not included |
| Output level | Included | Not included |
| Auto-gain | Not included | Included |
Keyboard and mouse shortcuts
These work in every Oxidex format (AU, VST3, CLAP, AAX, Standalone).
| Reset a control to its default | Double-click the knob or slider |
|---|---|
| Scroll to change a value | Hover over a knob and scroll the mouse wheel |
| Type an exact value | Click the value below a knob and type a number |
Frequently Asked Questions
Which tape speed should I pick?
7.5 IPS for vintage warmth with a 60 Hz head bump, 15 IPS for a classic studio sound at 80 Hz, and 30 IPS for hi-fi at 100 Hz. The speed also changes the saturation and the high-end rolloff.
When do the tape dropouts start?
Above 50% on Wear. Below that, Wear adds wow, flutter and spectral aging without dropouts.
What does Link do?
It couples Drive and Output, so you can compare tape character without a change in level.
Does Oxidex add latency?
A fixed 1.5 ms lookahead. It always reports the HQ latency to your DAW, so switching the Quality setting is gapless.
What is the difference between White and Brownian hiss?
Brownian is darker, with a −6 dB/octave noise floor that suits a worn, 7.5 IPS sound. White is brighter.
Where can I find more about Oxidex?
On the Oxidex page: its features, system requirements and how to get it.
How do I buy and install Oxidex?
- Buy it. Oxidex is a one-time purchase. Buy it from the Oxidex page, and the store emails you the download link.
- Run the installer. On macOS, double-click the .pkg file and choose AU, VST3, CLAP, AAX or Standalone. On Windows, run the .exe installer and choose VST3, CLAP or Standalone.
- Open your DAW. Restart your DAW and rescan plugins if needed, then find Oxidex under Remi Blaze in your plugin list.
More about Oxidex, including its features and system requirements, is on the Oxidex page.
Where are the plugin files?
If you need to find Oxidex on disk, for example to troubleshoot or to uninstall it manually, these are the standard locations.
| macOS AU | ~/Library/Audio/Plug-Ins/Components/ |
|---|---|
| macOS VST3 | ~/Library/Audio/Plug-Ins/VST3/ |
| macOS CLAP | ~/Library/Audio/Plug-Ins/CLAP/ |
| macOS AAX | /Library/Application Support/Avid/Audio/Plug-Ins/ |
| Windows VST3 | C:\Program Files\Common Files\VST3\ |
| Windows CLAP | C:\Program Files\Common Files\CLAP\ |
To uninstall, quit your DAW and delete the Oxidex file from the relevant folder. Your DAW will stop listing it on its next rescan.
Need help with Oxidex?
If something isn't covered here, or Oxidex doesn't behave as described, contact support or email support@remiblaze.com. To get an answer faster, include:
- your operating system and version (for example macOS 15.6 or Windows 11)
- your DAW and its version
- the format you're using (AU, VST3, CLAP, AAX or Standalone)
- the Oxidex version, shown in the About panel (click the Fire Head)
- what you did, what you expected, and what happened instead
This manual is for Oxidex 1.1.0. Controls and settings can change between versions, so if something here doesn't match what you see, check which version you have: click the Fire Head to open Oxidex's About panel. Spotted a mistake or have a question? Let us know.