What is Sassix?
Sassix is a vocal dynamics and tone plugin for Mac and Windows. It pushes a vocal up front, bright and finished, in one pass, in place of a de-esser, a compressor and an exciter chain. It is built for rap, spoken-word, pop and electronic vocals that need to sit on top of a heavy bassline without getting harsh.
Smart Breath-Duck tames breaths and room noise first, the AGC Rider levels the vocal toward a target, and Squeeze lifts the quiet syllables, breaths and tails forward. Spit adds consonant attack, Silk tames the harsh 2 to 8 kHz zone and Air adds sheen, while React lets the vocal's own level steer Spit and Silk. A ducking Wash adds space in the gaps, and a 0 dBFS ceiling at the end keeps the output from passing overs.
How does vocal dynamics and tone shaping work?
A vocal that jumps between loud and quiet lines is hard to place in a mix. An automatic gain rider flattens those jumps by turning the level up and down to meet a target, so the vocal sits at a steady level before any further processing.
Upward compression then lifts the quiet detail (breaths, tails, room) closer to the loud parts, making the vocal denser without squashing the peaks. On the tone side, a spectral de-harsher works only on the narrow band where sibilance and harshness live, reducing those frequencies when they spike and letting them through when they are clean.
Quick start
Get a result with Sassix in under a minute.
- Insert it. Put Sassix on the track or bus you want to process.
- Pick a preset. Open the Presets menu and choose one close to what you want.
- Shape it. Work through the numbered controls below until it sounds right to your ear.
- Blend to taste. Pull Mix back from 100% if you want a subtler result.
- Compare. Bypass the plugin in your DAW to hear before and after.
The interface
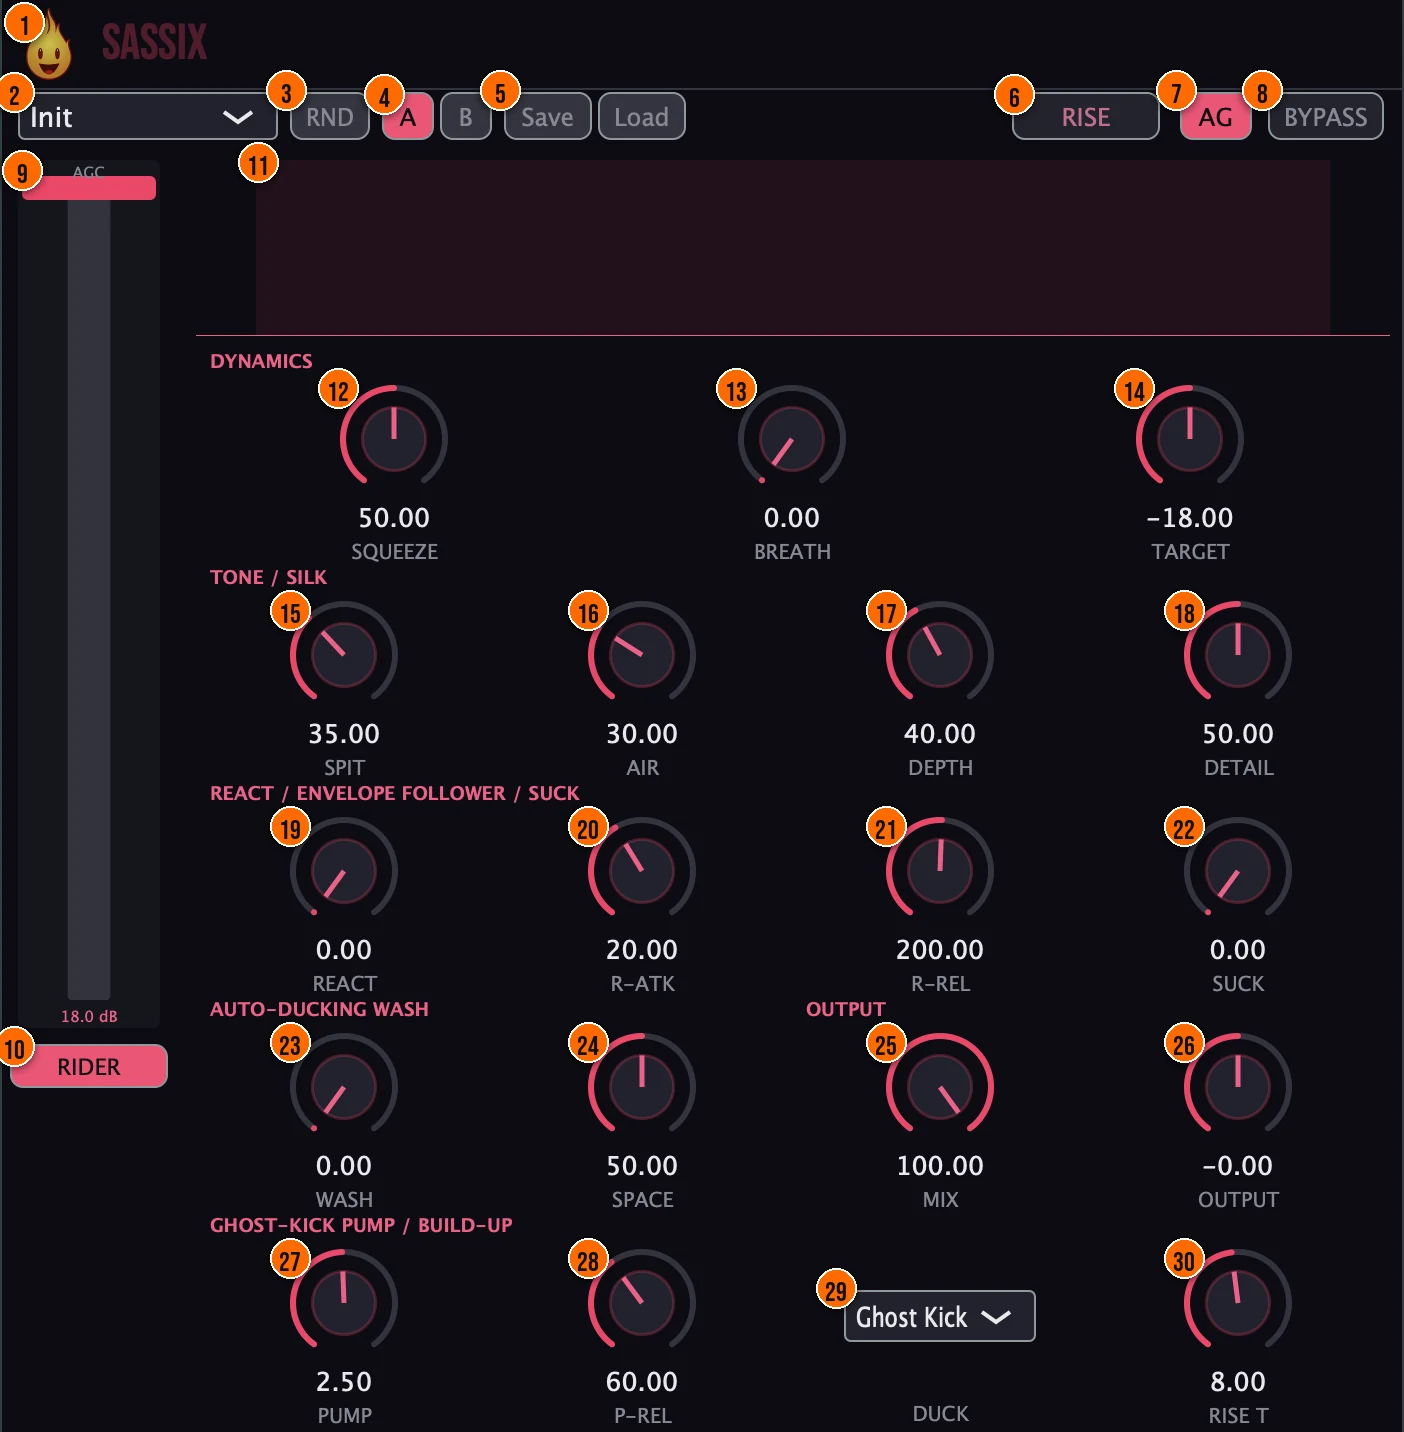
Controls
Top bar

- 1Fire Head: click the flame logo to open the About panel: what the plugin is, who made it, its version and the trademark notices. Click anywhere in the panel to close it.
- 2Presets: 11 factory presets, from Female Rap Front and Spoken Word Intimate to Bassline Cutter, Smooth De-Harsh and Podcast Leveler.
- 3RND (Randomize): new settings at random.
- 4A / B: compare two versions of your settings.
- 5Save / Load: save your settings as a preset file (XML), or load one back.
- 6Rise (Build-Up): a latching performance toggle. It ramps into a tempo-synced wall of sound over the number of bars set with Rise T, then slams back to the dry vocal when you release it.
- 7AG (Automatic Gain): matches the output level (RMS) to the input, so you hear the change in shape, not just a louder vocal. It is on by default.
- 8Bypass: for comparing against the dry signal. Every stage keeps running while bypassed, so switching it doesn't glitch.
AGC Rider
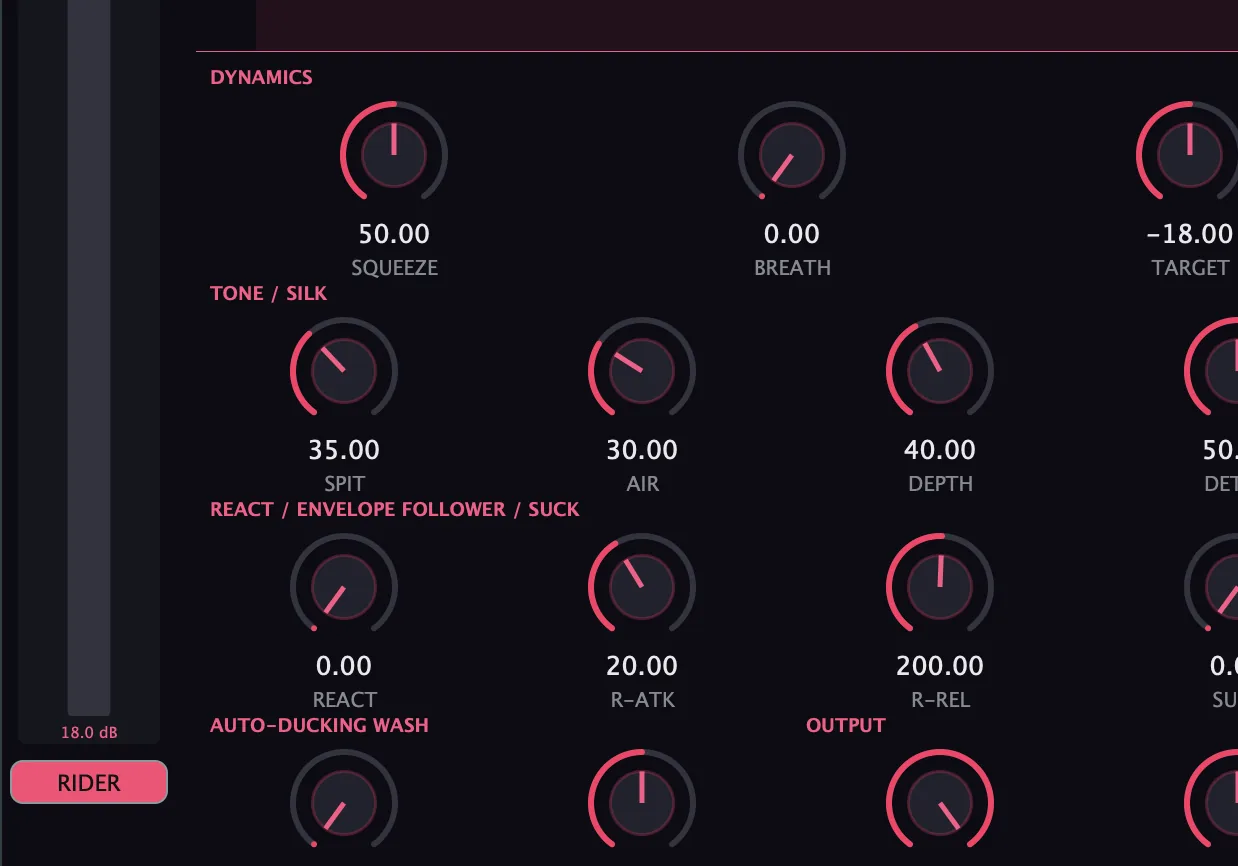
- 10Rider: switches the AGC Rider on or off. The Rider is an automatic leveler that flattens an uneven vocal toward the target level before compression.
- 14Target (Rider Target): the level the AGC Rider aims for.−30 to −6 dB
Dynamics

- 12Squeeze: multiband upward compression that pulls quiet breaths and tails forward. It is the main density control, with threshold and ratio behind one knob.Tip Start low and raise Squeeze until you hear the quiet syllables and tails come forward. Too much makes the vocal sound flat and over-compressed.
- 13Breath (Smart Breath-Duck): gently turns down breaths, lip smacks and room noise before the Rider, so the leveler doesn't lift them.Tip Keep Breath high enough that the Rider does not lift breaths and room noise. Watch the spectrum display to see the breath level.
Tone / Silk

- 15Spit: a transient designer on the 3 to 5 kHz presence band that adds consonant attack, so the vocal cuts through. It goes from neutral to an aggressive presence punch.Tip Spit works best after the Rider has leveled the vocal. A small amount adds clarity; too much makes consonants poke out.
- 16Air: an analog-modeled 10 kHz high shelf with a gentle resonant bump, for sheen in place of an exciter.Up to +9 dBTip Air is a shelf, not a spike. Add it after Silk has tamed the harshness, so the sheen sits on top of a clean midrange.
- 17Depth (Silk): how hard Silk tames harshness. Silk is a phase-preserving spectral de-harsher that works only on the 2 to 8 kHz zone and releases instantly, so clean passages stay open.Tip Raise Depth until the 2 to 8 kHz harshness settles, then stop. If the vocal sounds dull, back off or raise Detail so Silk releases faster.
- 18Detail (Silk): how tightly Silk tracks the harsh peaks. It works alongside Depth, which sets how hard Silk tames them.
React / envelope follower / Suck

- 19React: lets the vocal's own level steer Spit and Silk, so the vocal mixes itself. Louder input pulls the saturation down and tames the harsh band more; quieter input eases back to restore air in the gaps.Tip React makes Spit and Silk respond to the vocal's level. Higher values mean louder lines get calmer and quieter lines stay open, so the vocal mixes itself.
- 20R-Atk (React Attack): how fast React responds when the vocal gets louder.1 to 200 ms
- 21R-Rel (React Release): how fast React lets go when the vocal gets quieter.20 to 1000 ms
- 22Suck: a gritty radio effect that fills the gaps between phrases, through a telephone bandpass and a bitcrusher. It works on the inverse of the vocal's level, so it comes up when the vocal stops.
Auto-ducking Wash
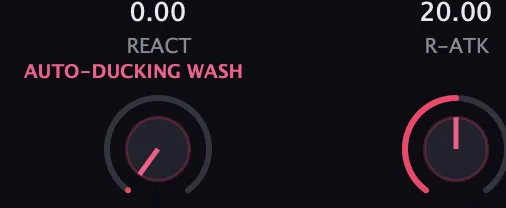
- 23Wash: the amount of the parallel space: a reverb fed by a short stereo feedback delay. It ducks under the vocal and blooms into the gaps by itself, with no host sidechain.Tip Set Duck to Vocal so the Wash gets out of the way when the singer is singing and fills the gaps between phrases.
- 24Space (Wash Size): the size of the Wash: room size, width, delay time and feedback together. Larger is a bigger space.Delay time 90 to 270 ms
Output
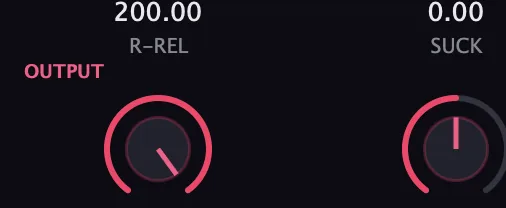
- 25Mix: blends the processed vocal with the dry signal, at equal power.Tip Pull Mix back for a lighter touch on a spoken-word recording, or keep it at 100% on a rap vocal that needs to sit right up front.
- 26Output: the output trim.−12 to +12 dB
Ghost-Kick Pump / Build-Up
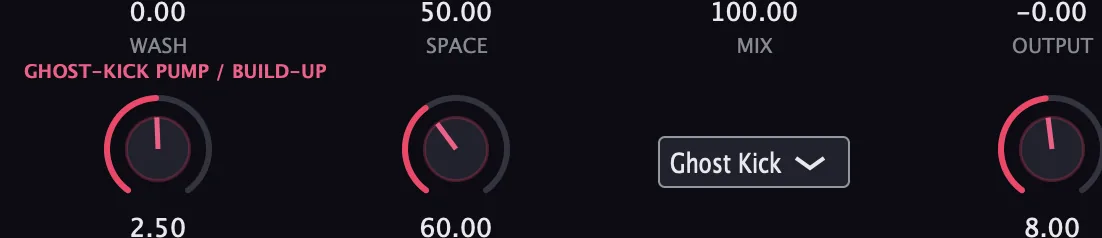
- 27Pump: the shape of the Ghost Kick pump: how sharply the Wash ducks on each beat. Higher gives a tighter, snappier, kick-shaped pump.0.5 to 6, default 2.5
- 28P-Rel (Pump Release): how fast the Wash blooms back after each ghost kick.5 to 400 ms, default 60 ms
- 29Duck: what the Wash ducks to. Ghost Kick is a tempo-locked 4/4 pump that works even when the vocal is silent; Vocal ducks off the dry voice's own level.Ghost Kick or Vocal, default Ghost Kick
- 30Rise T: how many bars Rise takes to climb to the wall of sound, and to fall back when you release it. It follows your DAW's tempo.1 to 32 bars, default 8
Meters and displays
- 9AGC fader: the AGC Rider's fader, which moves by itself as the Rider levels the vocal.
- 11Spectrum display (Silk visualizer): shows the spectrum, with a darker notch carved out where Silk is taming harshness, so you can see the de-harshing happen.
Key specs*
| Look-ahead | 2 ms, so the dynamics react before transients arrive |
|---|---|
| Latency | Constant, reported to your DAW |
| Rider Target | −30 to −6 dB |
| Spit | 3 to 5 kHz presence band |
| Silk | Phase-preserving FFT de-harsher, 2 to 8 kHz |
| Air | 10 kHz high shelf, up to +9 dB |
| React | Attack 1 to 200 ms, release 20 to 1000 ms |
| Wash | Reverb with a stereo feedback delay (90 to 270 ms) |
| Output | −12 to +12 dB trim, 0 dBFS true-peak ceiling |
| Presets | 11 factory presets; save and load as XML |
* Key specs from the plugin page. Some specs may not be listed.
How does the sound flow through Sassix?
A simplified view of the main path.
Spit, Silk and Air shape the tone along the way, and the Wash runs in parallel, fed from the dry signal and folded through the ceiling.
How do I make a rap vocal sit on top of a heavy bassline with Sassix?
- Start from a preset. Put Sassix on the vocal and load Female Rap Front or Bassline Cutter.
- Level it. Switch on Rider and set Target, so the quiet and loud lines come closer together.
- Lift the detail. Turn up Squeeze to pull the quiet syllables and tails forward, and Breath to keep the breaths down.
- Cut through. Add Spit for consonant attack and Air for sheen, then raise Depth until the harshness in the 2 to 8 kHz zone settles.
- Let it mix itself. Turn up React so louder lines get tamer and quieter ones open up.
- Add space and finish. Add some Wash, set Duck to the vocal so it blooms in the gaps, switch on AG, and set Mix and Output.
How do I level and clean up a podcast vocal with Sassix?
- Start from a preset. Put Sassix on the vocal and load Spoken Word Intimate or Podcast Leveler.
- Level it. Switch on Rider and set Target so the loud and quiet passages come closer together.
- Tame the breaths. Raise Breath until breaths and mouth noises duck by themselves.
- Add density. Turn Squeeze up gently, just enough that the quiet tails are easier to hear.
- Smooth the tone. Raise Depth until any harshness in the midrange settles. A podcast voice does not usually need Spit or Air.
- Finish. Switch on AG, set Mix to 100% and adjust Output.
What about Sassix Raw?
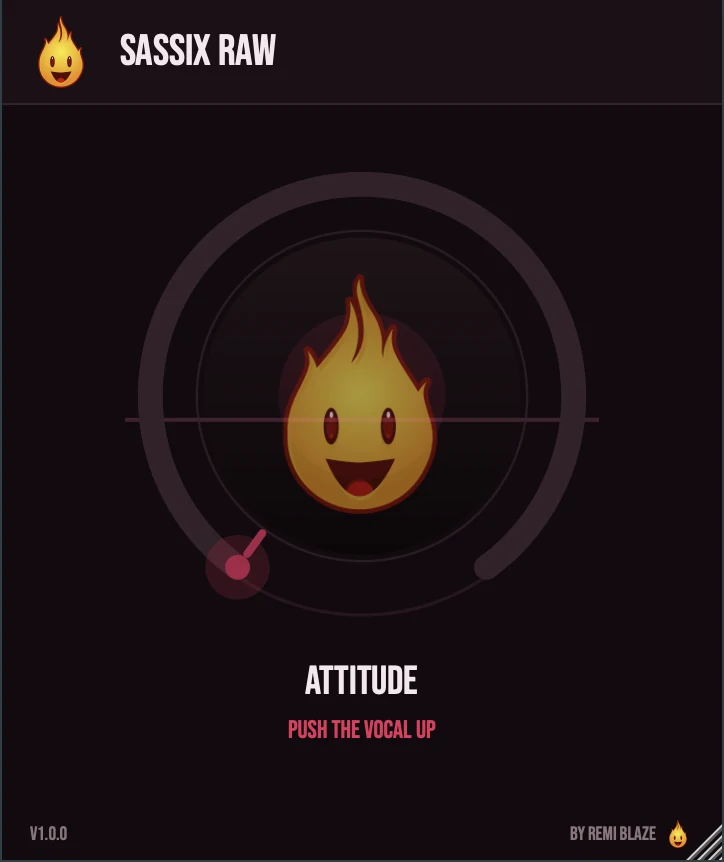
Sassix Raw is the one-knob version, also a paid one-time purchase. Its ATTITUDE knob drives upward compression, a 3 to 5 kHz presence band, a 10 kHz air shelf and a bright exciter together. A Silk servo tames the harshness the brightness creates, and auto-gain keeps it level-matched, so the vocal gets bigger, not just louder. Its own manual: Sassix Raw manual.
Sassix vs. Sassix Raw
A side-by-side look at what each version includes.
| Feature | Sassix | Sassix Raw |
|---|---|---|
| Presets | Included | Not included |
| Randomize | Included | Not included |
| Mix (dry/wet) | Included | Not included |
| Output level | Included | Not included |
| Auto-gain | Not included | Included |
Keyboard and mouse shortcuts
These work in every Sassix format (AU, VST3, CLAP, AAX, Standalone).
| Reset a control to its default | Double-click the knob or slider |
|---|---|
| Scroll to change a value | Hover over a knob and scroll the mouse wheel |
| Type an exact value | Click the value below a knob and type a number |
Frequently Asked Questions
Does Sassix add latency?
Yes, a constant amount. Its 2 ms look-ahead lets the dynamics react before transients arrive, and the latency is reported to your DAW, so playback stays in time.
What does React do?
It follows the vocal's level and steers Spit and Silk with it. Louder lines get less saturation and more de-harshing; quieter lines ease back and keep their air. R-Atk and R-Rel set how fast it responds.
How do I stop the Wash from clouding the vocal?
The Wash ducks itself under the vocal and blooms into the gaps. Set Duck to follow the vocal, or to Ghost Kick for a tempo-locked 4/4 pump, and use Pump and P-Rel to shape the duck.
Why switch on AG?
AG matches the output level to the input, so when you compare settings you hear the change in shape rather than a vocal that is simply louder.
Where can I find more about Sassix?
On the Sassix page: its features, system requirements and how to get it.
How do I buy and install Sassix?
- Buy it. Sassix is a one-time purchase. Buy it from the Sassix page, and the store emails you the download link.
- Run the installer. On macOS, double-click the .pkg file and choose AU, VST3, CLAP, AAX or Standalone. On Windows, run the .exe installer and choose VST3, CLAP or Standalone.
- Open your DAW. Restart your DAW and rescan plugins if needed, then find Sassix under Remi Blaze in your plugin list.
More about Sassix, including its features and system requirements, is on the Sassix page.
Where are the plugin files?
If you need to find Sassix on disk, for example to troubleshoot or to uninstall it manually, these are the standard locations.
| macOS AU | ~/Library/Audio/Plug-Ins/Components/ |
|---|---|
| macOS VST3 | ~/Library/Audio/Plug-Ins/VST3/ |
| macOS CLAP | ~/Library/Audio/Plug-Ins/CLAP/ |
| macOS AAX | /Library/Application Support/Avid/Audio/Plug-Ins/ |
| Windows VST3 | C:\Program Files\Common Files\VST3\ |
| Windows CLAP | C:\Program Files\Common Files\CLAP\ |
To uninstall, quit your DAW and delete the Sassix file from the relevant folder. Your DAW will stop listing it on its next rescan.
Need help with Sassix?
If something isn't covered here, or Sassix doesn't behave as described, contact support or email support@remiblaze.com. To get an answer faster, include:
- your operating system and version (for example macOS 15.6 or Windows 11)
- your DAW and its version
- the format you're using (AU, VST3, CLAP, AAX or Standalone)
- the Sassix version, shown in the About panel (click the Fire Head)
- what you did, what you expected, and what happened instead
This manual is for Sassix 1.1.0. Controls and settings can change between versions, so if something here doesn't match what you see, check which version you have: click the Fire Head to open Sassix's About panel. Spotted a mistake or have a question? Let us know.